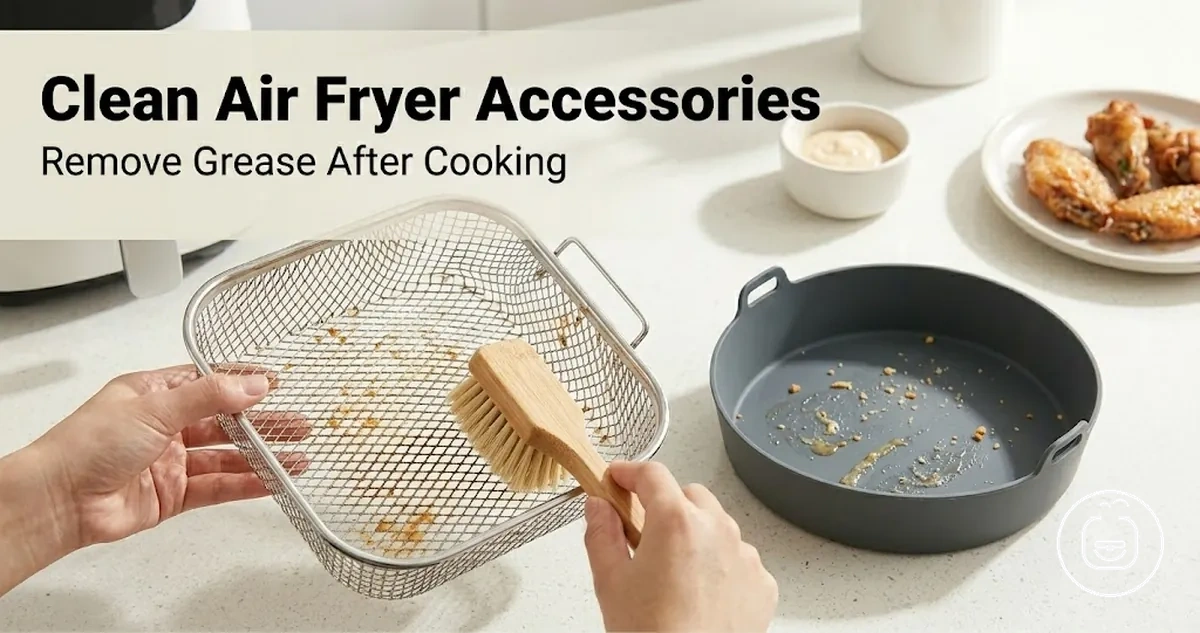
How to Clean Greasy Air Fryer Accessories Safely
Cleaning greasy air fryer accessories starts with allowing removable parts such as liners, racks, trays, and inserts to cool, then loosening residue with warm soapy water before using non-abrasive tools, rinsing thoroughly, and drying them thoroughly for safe reuse.
This process applies specifically to removable air fryer accessories and not fixed internal components, where cleaning conditions differ. Effectiveness can vary depending on material, coating type, and how hardened the grease is, so each step should be adjusted to reduce surface damage while ensuring residue and odor are removed as far as possible.
Removable Accessories That Need Cleaning After Air Frying
Air fryer accessory cleaning covers removable items used inside or with the basket, not the whole appliance. Removable air fryer accessories such as liners, racks, trays, inserts, and skewers come into direct contact with food, oil, and residue, so cleaning needs vary depending on exposure and buildup.
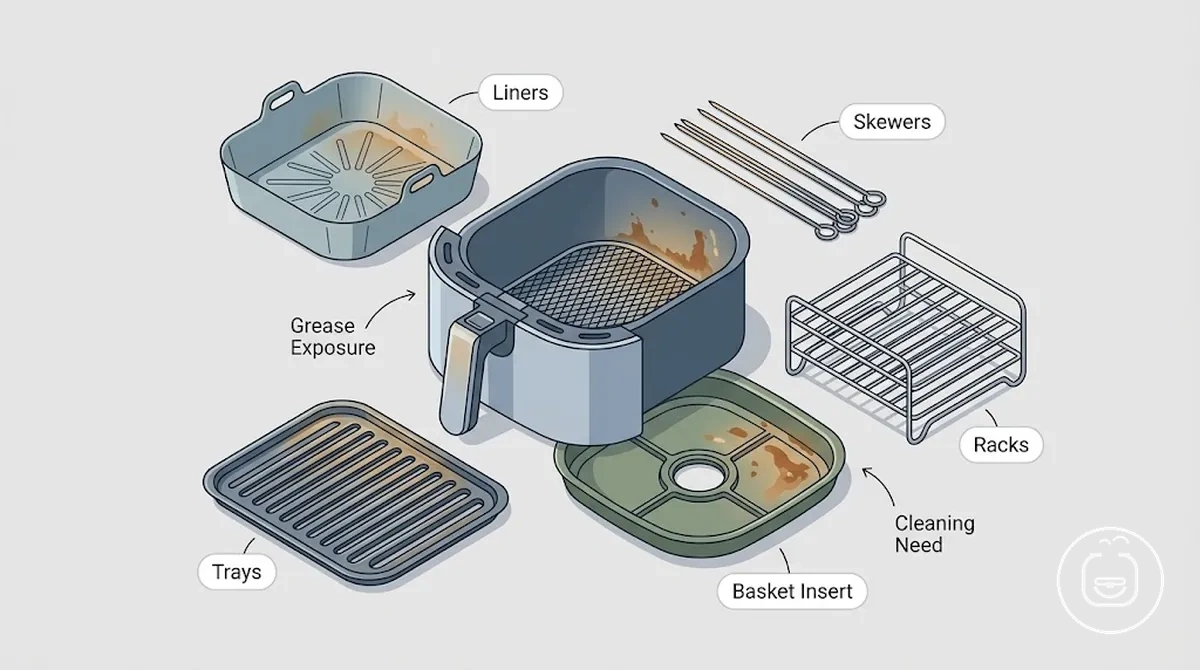
Removable accessories are different from fixed appliance parts such as heating elements, which are not part of routine accessory washing; a broader overview is available in air fryer accessories guide.
The table below organizes common removable air fryer accessories by their typical residue exposure and cleaning sensitivity to help separate high-grease surfaces from lighter-contact items.
| Accessory | Residue Type | Cleaning Risk or Handling Outcome |
|---|---|---|
| Liners | Oil and food drips | May require gentle soaking depending on coating and grease level |
| Racks | Baked-on grease and crumbs | May need loosening before washing to avoid residue buildup |
| Trays | Oil splatter and caramelized residue | Cleaning effort varies with food type and exposure time |
| Basket inserts | Mixed grease and particle residue | May need repeated rinsing when buildup is heavy |
| Skewers | Light grease and food coating | Usually easier to clean but depends on material finish |
Safe Tools and Cleaning Solutions for Air Fryer Accessories
Cleaning tools and cleaning solutions for air fryer accessories are selected based on surface sensitivity and grease level, where softer tools and mild cleaners help reduce coating damage while still removing oil and food residue effectively.
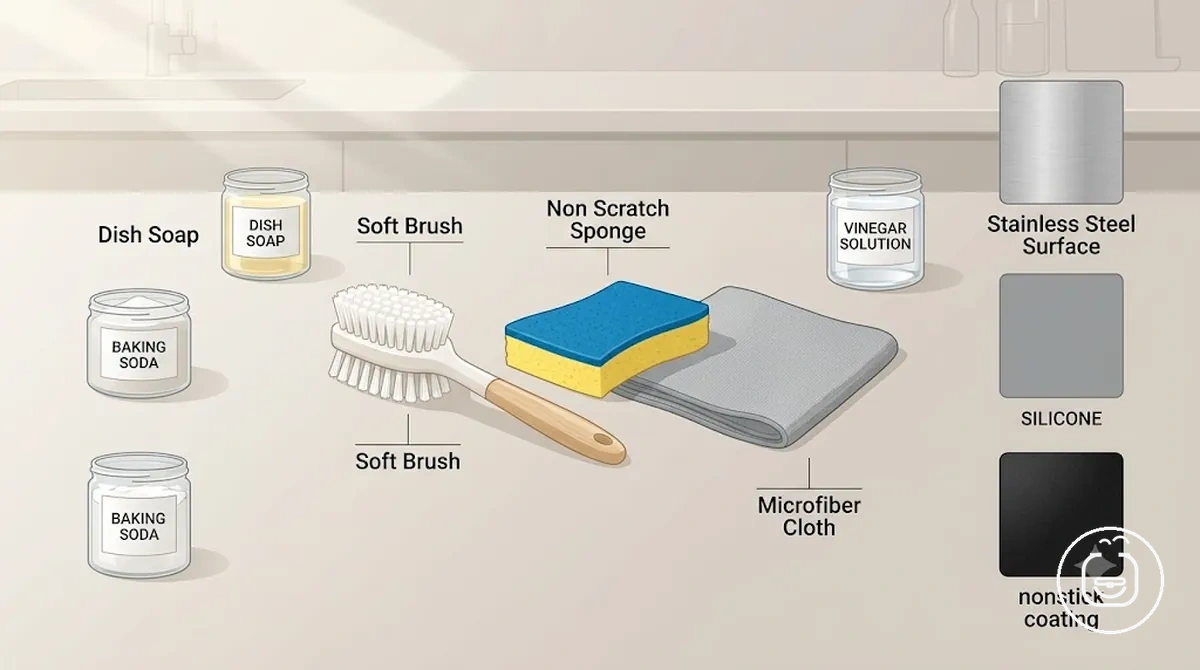
Tool softness and cleaner strength matter because removable air fryer accessories such as liners, racks, trays, silicone parts, and stainless steel surfaces react differently to abrasion, acidity, and alkaline agents depending on grease buildup and coating durability. Matching the cleaning method to material condition helps reduce surface wear while improving residue removal consistency.
Cleaning tool and solution selection for air fryer accessories depends on material sensitivity and residue severity, so choosing compatible methods helps reduce coating damage and maintain usability across silicone, stainless steel, and nonstick surfaces; cleaning safe materials provides a material-focused reference for compatibility boundaries.
- Soft brush → Non-abrasive bristles → Suitable for light to medium grease → Helps loosen residue without scratching nonstick coatings
- Non-scratch sponge → Flexible surface contact → Suitable for routine grease → Reduces friction risk on silicone and coated accessories
- Microfiber cloth → Low-friction wiping → Best for light residue → Minimizes streaks on stainless steel surfaces
- Dish soap → Mild surfactant cleaner → Safe for most materials → Breaks down everyday oil without harsh surface impact
- Baking soda paste → Mild abrasive mixture → For stuck grease → Requires careful use on nonstick surfaces to avoid wear
- Vinegar solution → Acidic cleaner → Useful for odor and light buildup → May require dilution depending on coating sensitivity
- Mild degreaser → Stronger cleaning agent → For heavy grease conditions → Must be checked against manufacturer coating guidance before use
Non-Abrasive Brushes, Sponges, and Cleaning Cloths
Non-abrasive brushes, sponges, and cleaning cloths are soft-contact tools used for cleaning air fryer accessories, where safety depends on how much pressure they apply and how they interact with coated, curved, or cornered surfaces.
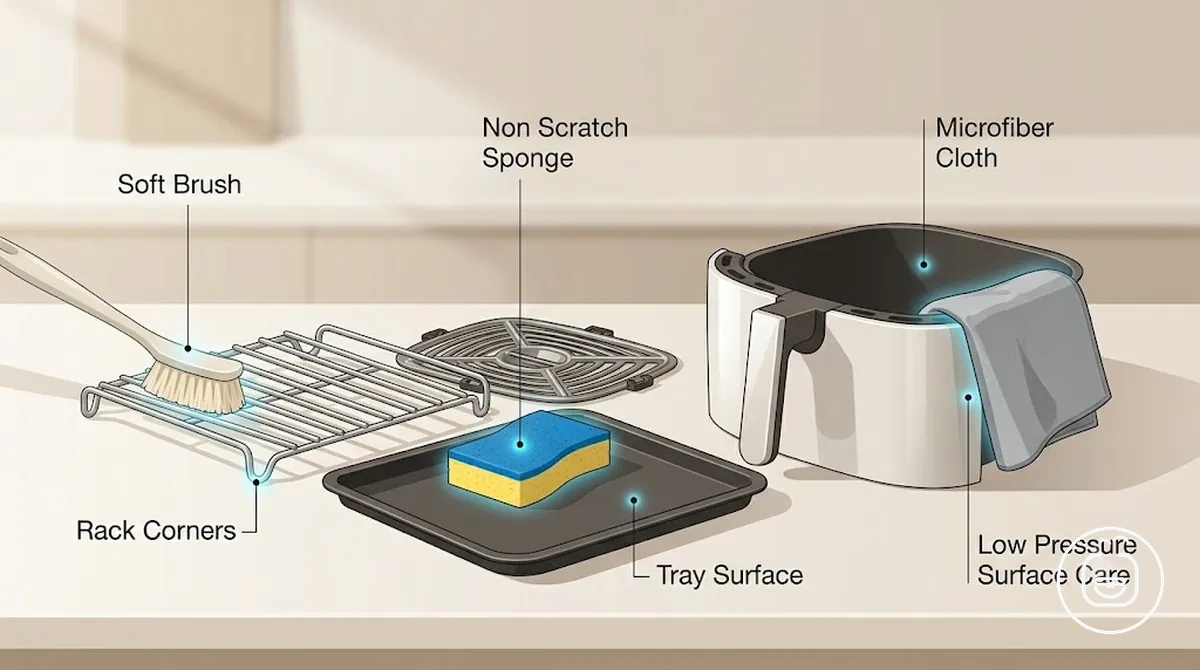
Brushes, sponges, and cloths differ in contact shape and pressure distribution, which directly affects how safely they clean nonstick coatings, stainless steel surfaces, and tight interior gaps. Lower and more controlled pressure reduces the chance of surface wear, especially where grease is trapped in edges or textured areas.
Tool selection should match surface shape and residue placement, since uneven or excessive pressure can increase coating stress while softer contact improves control during cleaning.
- Soft brush → Focused bristle contact → Useful for rack gaps and tray corners → May increase coating stress if pressure is too strong
- Non-scratch sponge → Broad flexible contact → Suitable for flat trays and liners → Reduces localized abrasion on coated surfaces
- Microfiber cloth → Low-pressure wiping → Effective for light residue on stainless steel → Minimizes surface drag and streaking
Dish Soap, Baking Soda, Vinegar, and Degreasers
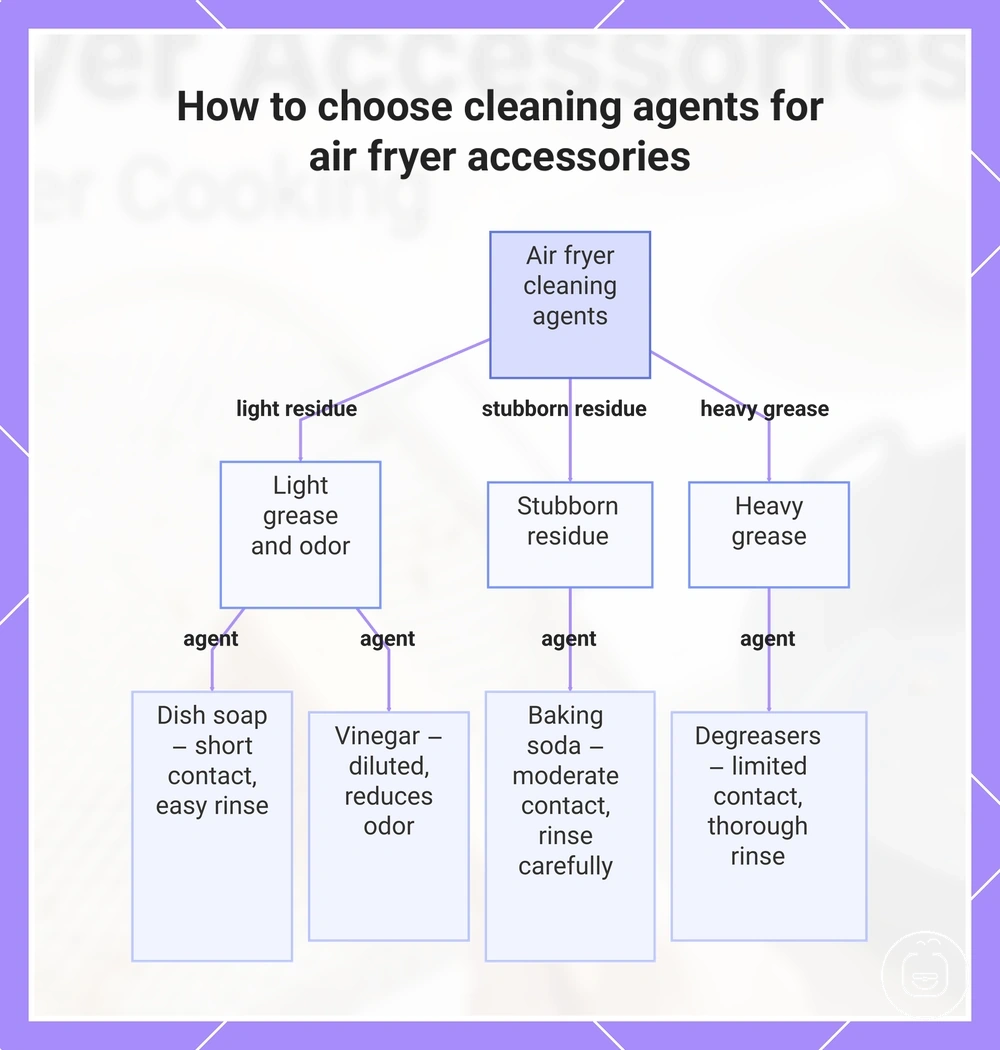
Dish soap, baking soda, vinegar, and degreasers are cleaning agents used on air fryer accessories, where their effectiveness depends on grease level, material condition, and how long they remain in contact before rinsing.
Routine washing and stronger residue treatment differ in intensity, since mild grease typically responds to dish soap while baked-on residue may require stronger agents applied with controlled contact time and immediate rinsing to reduce surface stress.
Each cleaning agent should be matched to residue type and accessory condition, because acidic, alkaline, and stronger degreasing formulas can behave differently on coated or sensitive surfaces.
- Dish soap → Light grease → Short contact → Breaks down everyday oil and rinses easily
- Baking soda → Stubborn residue → Short to moderate contact → Helps loosen buildup but may need careful rinsing on coatings
- Vinegar → Odor or light staining → Diluted use → Can assist with smell reduction but depends on surface sensitivity
- Degreasers → Heavy grease → Limited contact → Strong cleaning effect but requires careful compatibility and thorough rinsing
This chart shows which cleaning agent to use for light grease, stubborn residue, and heavy grease on air fryer accessories, based on residue type and recommended contact time.
Cleaners and Scrubbing Methods to Avoid
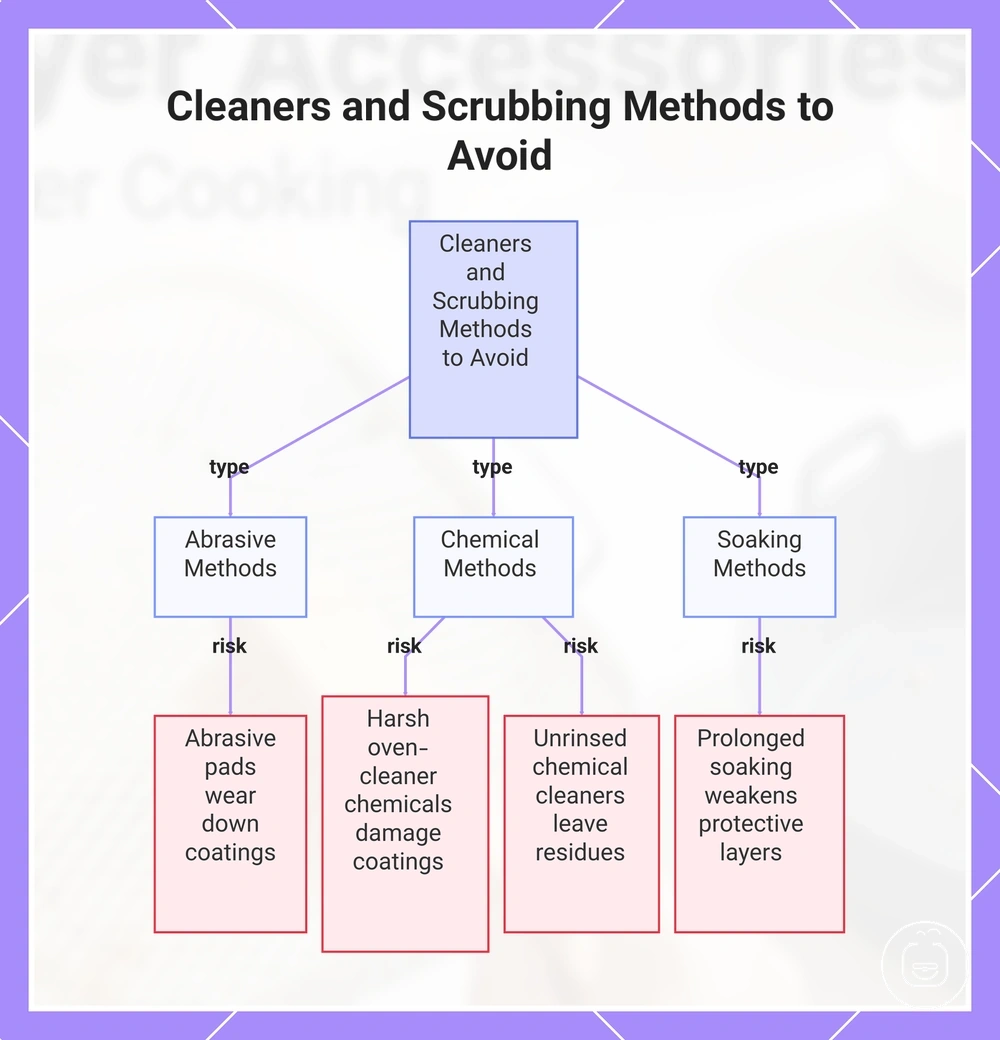
Cleaners and scrubbing methods to avoid are abrasive or chemically aggressive approaches that can damage air fryer accessory surfaces, especially when coatings are present or when residue buildup makes surfaces more sensitive to friction and chemical exposure.
Surface damage can change how air fryer accessories behave during cleaning and reuse, since worn coatings may hold grease more easily and increase residue retention, which raises the risk of uneven cleaning results over time.
- Abrasive pads or metal scrubbers → High friction contact → Can wear down nonstick or coated surfaces → May increase long-term sticking and surface degradation risk, especially on coated trays
- Harsh oven-cleaner style chemicals → Strong chemical reaction → May be too aggressive for coated accessories → Can leave residues that require careful rinsing before reuse
- Prolonged soaking of coated parts → Extended water exposure → May weaken protective layers depending on material type → Can reduce coating durability over repeated use
- Unrinsed chemical cleaners → Residual cleaning agents on surface → May remain after washing → Can affect food-contact safety and taste conditions during cooking
This chart shows the categories of cleaners and scrubbing methods that can damage air fryer accessories and the specific risks associated with each.
Basic Hand-Washing Process for Air Fryer Accessories
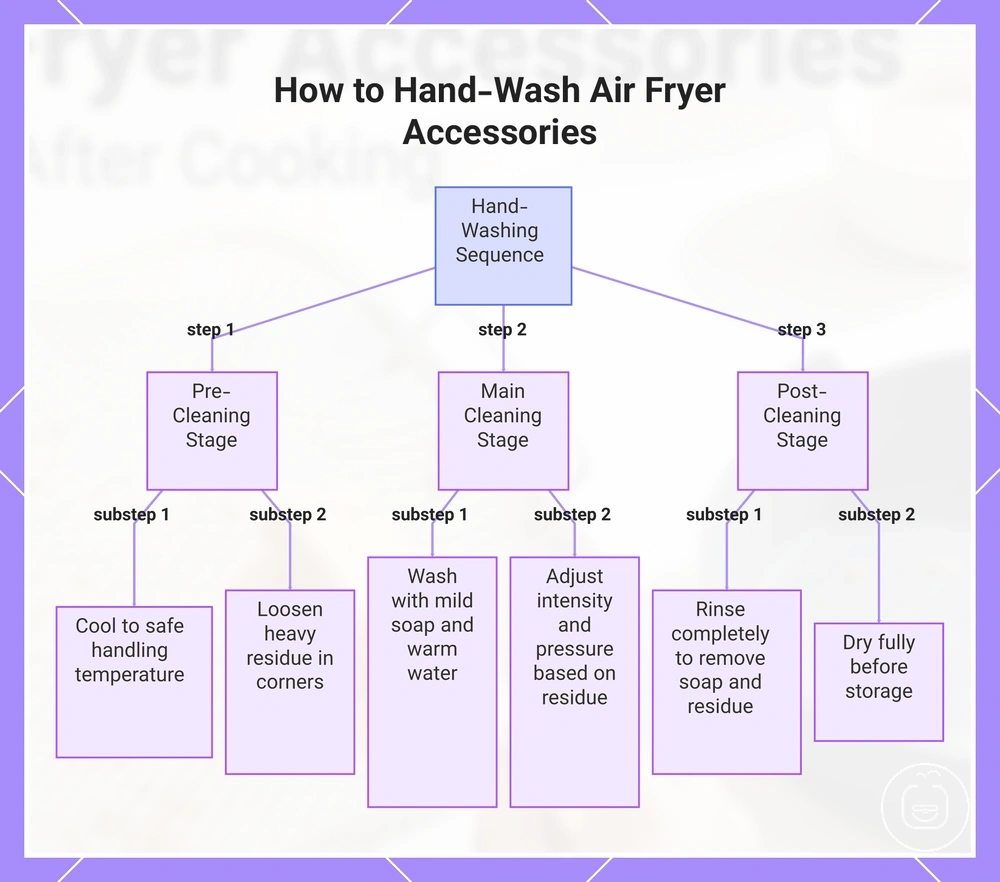
The hand-washing process for air fryer accessories depends on completing a fixed sequence of cooling, loosening residue, washing, rinsing, and drying, because changing the order can leave grease behind or increase surface stress on coated or metal parts.
This sequence applies to removable accessories such as baskets, trays, and racks, where light grease usually releases quickly, while heavier food residue may need slightly longer loosening before washing begins.
- Cool the accessory → Let the basket, tray, or rack reach a safe handling temperature before water contact to avoid thermal stress on the surface.
- Loosen loose residue → Remove food particles from corners, mesh areas, and edges where buildup is usually concentrated.
- Wash with mild soap and warm water → Use dish soap with controlled water temperature, adjusting cleaning intensity depending on whether residue is light grease or heavier buildup.
- Scrub with appropriate pressure → Apply gentle pressure on nonstick or coated surfaces and slightly firmer pressure only where material strength allows.
- Rinse completely → Ensure all soap and loosened grease are removed, since leftover residue can affect reuse performance and taste.
- Dry fully → Air-dry or wipe dry before storage to reduce moisture retention and prevent residue reactivation.
This chart shows the hand-washing sequence for air fryer accessories, including preparation, cleaning, and finishing steps.
Cool and Soak Accessories Before Scrubbing
Cooling and soaking air fryer accessories reduces scrubbing force by lowering surface temperature and loosening grease or food residue before direct cleaning begins.
This step is important because hot accessories can be unsafe to handle and hardened residue typically softens when exposed to water, depending on material type and how strongly the food has adhered to the surface.
- Cool the accessory first → Allow the basket, tray, or rack to fully cool before handling, since high temperature increases handling risk and can stress coated surfaces when exposed to water.
- Soak based on residue condition → Place the accessory in warm soapy water, where light grease may loosen quickly while heavier residue may require longer soaking depending on material sensitivity and buildup level.
- Prepare for gentle scrubbing → Check whether residue has softened enough to reduce scrubbing force, since soaking is intended to assist cleaning rather than replace controlled washing.
Brush Food Residue Without Damaging Coated Surfaces
Coated air fryer surfaces are cleaned by brushing softened food residue using controlled pressure so nonstick or silicone layers are not disrupted while buildup is gradually lifted from the surface.
Coated trays and liners require soft-bristle contact because pressure sensitivity differs across nonstick and silicone materials, and residue removal depends more on loosened adhesion than on forceful scrubbing action.
Stuck food may release under light brushing once softened, while baked-on grease typically needs repeated gentle passes; both require limiting pressure to avoid coating stress and surface wear.
Brush control checklist → Verify brushing conditions before continuing surface cleaning:
- Soft bristles are used for coated surfaces
- Pressure remains light and evenly distributed
- Brush angle avoids scraping motion
- Residue loosens progressively without force escalation
Rinse, Dry, and Check Edges for Remaining Buildup
Rinsing, drying, and edge inspection complete the cleaning process by removing leftover soap, water, or grease from air fryer accessories and confirming that no hidden buildup remains in grooves, joints, or corners before reuse.
Accessory edges, rack joints, and tray corners often retain trapped moisture or thin grease layers, and if these remain after rinsing they may later contribute to odor, smoke, or uneven heating during use.
- Rinse quality check → Confirm that soap and loosened residue are fully removed, especially from perforations, edges, and internal grooves
- Drying check → Ensure accessories are fully air-dried or wiped dry so moisture does not remain in joints or folded areas
- Edge inspection → Inspect rack joints, tray corners, and grooves for hidden buildup or trapped water that may not be visible at first glance
A typical hidden-residue case occurs when a small amount of water remains inside a rack joint after rinsing, which can later produce odor or light smoke when the accessory is heated.
:contentReference[oaicite:0]{index=0}
How to Remove Baked-On Grease from Accessories
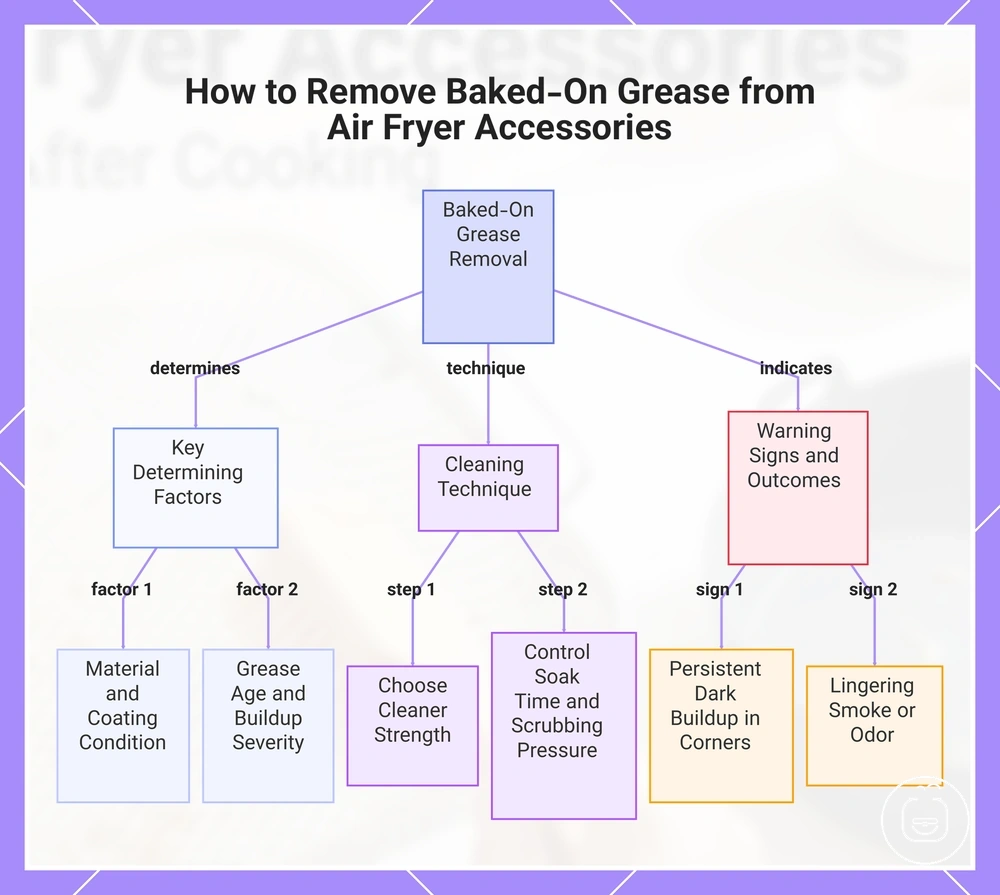
Baked-on grease on air fryer accessories usually requires soaking, mild grease treatment, and controlled non-abrasive cleaning, because forceful scraping can damage coated surfaces and may not fully remove hardened residue depending on material condition and grease age.
Grease severity and accessory material determine the treatment approach, where coating condition, grease age, cleaner strength, soak time, and scrubbing pressure collectively influence how safely residue can be loosened without causing surface wear or incomplete cleaning results.
- Accessory material → Nonstick, stainless steel, or silicone surfaces → determines tolerance for soaking and scrubbing pressure
- Coating condition → Intact or worn layers → affects risk of residue bonding and surface damage during cleaning
- Grease age → Fresh or long-baked buildup → influences how much soaking and repetition may be needed
- Cleaner strength → Mild or stronger degreasing action → must match surface sensitivity to avoid damage
- Soak time → Short or extended based on buildup → supports loosening but does not guarantee full removal
- Scrubbing pressure → Light non-abrasive contact → reduces coating stress while lifting residue gradually
Persistent dark buildup in tray corners or rack joints may indicate older grease layers or coating wear, which can slow removal and require repeated gentle treatment rather than aggressive cleaning methods.
In some cases, lingering smoke or odor may signal accessory problem signs, especially when grease remains trapped in grooves or joints after cleaning attempts.
Old or hardened residue may not fully disappear in all cases, particularly when coatings are already weakened or grease has been exposed to repeated high heat cycles.
:contentReference[oaicite:0]{index=0}
This chart shows the key factors, cleaning technique, and warning signs for safely removing baked-on grease from air fryer accessories.
Cleaning Liners, Racks, Trays, and Inserts by Accessory Type
Cleaning liners, racks, trays, and inserts depends on accessory type because each one exposes different surface materials, residue traps, and coating sensitivities that affect how grease should be removed safely.
These structural differences influence how residue builds up in edges, perforations, or flat surfaces, which means a single cleaning method may not be suitable across all accessory types.
| Accessory type | Material or shape attribute | Grease behavior | Safe cleaning action |
|---|---|---|---|
| Liner | Flexible or coated surface | Oil spreads or pools lightly on surface | Soak briefly and clean with non-abrasive wiping |
| Rack | Open grid with joints and gaps | Grease accumulates in intersections and edges | Use soft brushing focused on joints and corners |
| Tray | Flat or lightly coated base | Grease forms baked-on patches | Soak and gently scrub without scraping coating |
| Insert | Shaped or fitted component | Localized buildup in edges and contact points | Targeted cleaning with controlled pressure and rinsing |
Cleaning methods should vary by accessory shape and coating condition, since residue behavior changes depending on where grease collects and how strongly it bonds to the surface.
:contentReference[oaicite:0]{index=0}
Reusable Silicone Liners
Reusable silicone liners are flexible air fryer accessories that collect oil, odor, and residue differently from rigid trays because their soft structure and grooved edges can retain grease inside folds rather than keeping it fully exposed for easy rinsing.
In many cases, silicone liners show two distinct conditions after use: normal staining, which appears as surface discoloration without texture change, and oily residue, which feels slippery or sticky and indicates trapped grease that has not fully washed out.
Grooves, flipped edges, and folded sections can hold residue even after rinsing, so cleaning effectiveness depends on how well these areas are flushed and dried. Dishwasher safety and cleaning behavior may also depend on the product label, since not all silicone liners respond the same way under repeated cycles. This aligns with considerations in cleaning reusable liners when evaluating proper maintenance behavior.
Inspection checklist → After cleaning or dishwasher use, check silicone liners for:
- Greasy or slippery film in grooves and folded edges
- Odor retention after full drying
- Difference between dry staining and active oil residue
- Dishwasher compatibility label confirmation
Normal staining may remain even after proper cleaning, but persistent oily residue or odor usually indicates grease trapped in deeper folds or incomplete rinsing.
:contentReference[oaicite:0]{index=0}
Disposable Parchment Liners and Leftover Residue
Disposable parchment liners are single-use air fryer liners that are removed after cooking rather than washed, while the basket or accessory underneath may still require cleaning depending on how much oil or food has passed through during use.
After removal, leftover residue usually appears as small oil traces or crumbs on the basket surface, especially near edges or corners where the liner may not fully block airflow or where food particles shift during cooking.
Leftover cleaning needs depend on how the liner was positioned and how much residue transferred through it during heat exposure, since torn paper, lifted edges, or pooled oil can affect how much cleanup is required afterward.
Inspection checklist → After removing the parchment liner, check the basket area for:
- Oil or grease that passed under or around the liner edges
- Torn paper fragments or loose liner pieces
- Stuck crumbs in corners or perforated areas
- Pooled oil accumulation in low points of the basket
In some cases, grease may bypass the liner completely when edges lift during airflow, leaving localized residue that requires simple follow-up wiping rather than full washing.
:contentReference[oaicite:0]{index=0}
Metal Racks and Skewer Accessories
Metal racks and skewer accessories require focused cleaning at gaps, joints, and contact points because grease hardens in narrow spaces where airflow meets repeated heat exposure, making residue more difficult to remove than on flat surfaces.
Rack bars and skewer contact areas often trap oil between intersections, so cleaning effectiveness depends on how well these tight spaces are accessed rather than only scrubbing the outer metal surface.
Grease buildup typically concentrates at joints and corners, especially when food drips during cooking and settles in structural gaps where airflow cannot fully prevent residue adhesion.
Local cleaning checklist → Use targeted cleaning steps when rack bars, skewers, and corners show buildup:
- Soak racks or skewers briefly when grease is hardened in joints
- Use soft brushing to reach between bars and tight intersections
- Rinse thoroughly to clear loosened residue from gaps
- Dry completely to reduce moisture retention in joints or contact points
Light discoloration may appear on metal after repeated use, but rust or deeper corrosion signals that moisture or residue has remained in joints for extended periods and requires closer maintenance attention.
Nonstick Trays and Basket Inserts
Nonstick trays and basket inserts require low-force cleaning because their coating can be damaged by scraping, metal tools, or repeated harsh scrubbing, especially when grease has begun to bond to the surface.
Cleaning outcome depends on coating condition, residue level, tool softness, and drying method. Intact coatings usually release light residue easily, while worn or heat-stressed areas may retain buildup along edges and contact zones.
Condition-based checklist → Use these checks when scratches, peeling, or edge residue need inspection:
- Check surface for visible scratches or peeling before applying pressure
- Inspect edges where grease tends to accumulate and harden
- Use only soft cleaning tools and avoid metal or abrasive contact
- Ensure complete drying to prevent moisture trapping under residue layers
Visible coating damage such as peeling or exposed base material should be treated as a maintenance concern rather than routine cleaning, since it may indicate reduced coating performance over continued use.
:contentReference[oaicite:0]{index=0}
When Air Fryer Accessories Are Dishwasher Safe
Dishwasher safety for air fryer accessories depends on the accessory label, material type, coating condition, and manufacturer instructions, so it cannot be assumed across all removable parts.
Suitability is determined by how the material responds to detergent strength, water pressure, and heat exposure, especially where nonstick coatings or flexible silicone structures are involved.
Dishwasher use is typically decided by checking these conditions before loading the accessory, rather than assuming machine cleaning is appropriate for every material or coating type.
These criteria help determine whether an accessory can be placed in a dishwasher or should be hand-washed to reduce coating or structural risk.
| Accessory type | Dishwasher safety factors | Typical behavior | Cleaning decision |
|---|---|---|---|
| Nonstick trays | Coating condition, label, heat exposure | May lose coating stability under repeated cycles if not rated | Hand-wash often preferred when coating sensitivity is unclear |
| Metal racks | Material grade, joint exposure, drying efficiency | Usually tolerates washing but may show discoloration in joints | Dishwasher use depends on drying quality and corrosion risk |
| Silicone liners | Flexibility, odor retention, label confirmation | May retain detergent smell or residue in folds | Dishwasher safe only when explicitly marked; otherwise hand-wash preferred |
A hand-wash approach may be preferred when labels are unclear or when coatings show wear, since controlled cleaning reduces the risk of long-term surface degradation.
:contentReference[oaicite:0]{index=0}
How to Reduce Grease Buildup Between Uses
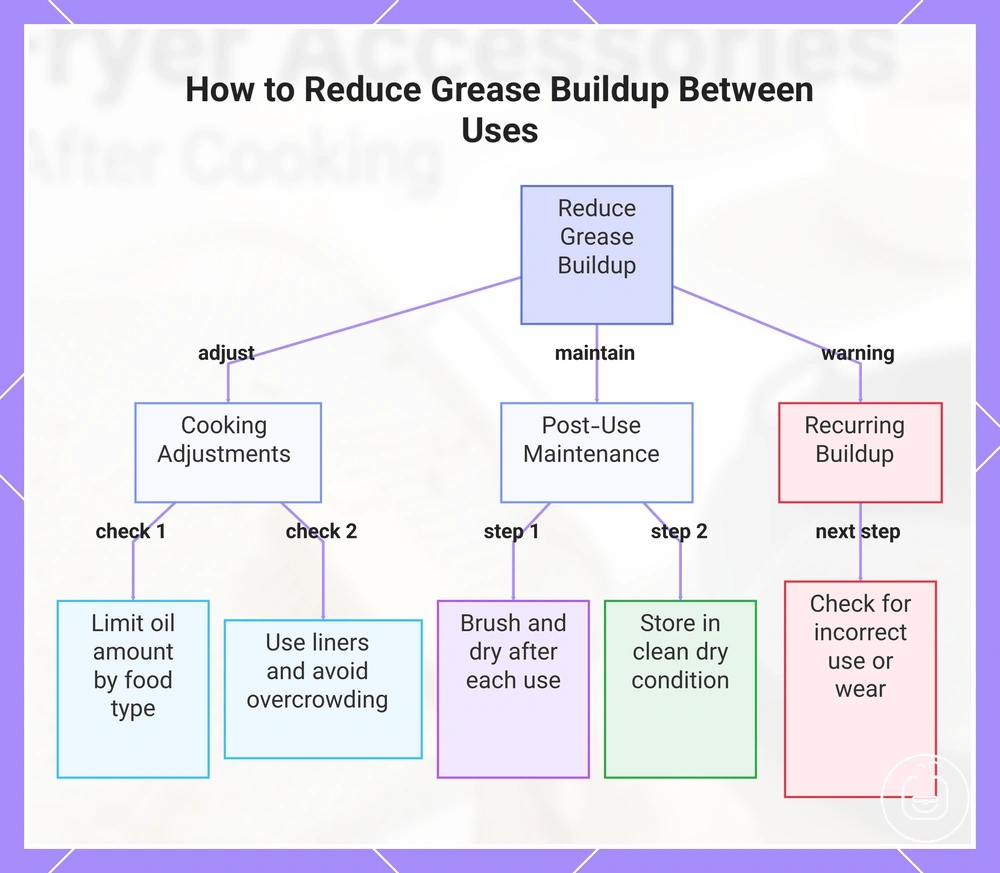
Reducing grease buildup between uses depends on controlling oil amount, spacing during cooking, and cleaning timing, since repeated residue typically comes from use conditions rather than a single cleaning step. Small adjustments in how accessories are used and maintained can lower how quickly grease accumulates on surfaces.
Repeated grease buildup often forms when cooking conditions and cleaning timing are not aligned. Mini-checklist:
- Control oil amount based on food type
- Choose liners that reduce direct surface contact
- Avoid overcrowding baskets or racks
- Maintain light brushing frequency after use
- Ensure proper drying before storage
- Store accessories in a clean, dry condition
Consistent usage habits such as spacing food properly and handling accessories with care while using accessories correctly can reduce how quickly grease bonds to surfaces, although results still vary by food type, oil level, and cleaning routine.
When grease buildup keeps returning even with proper habits, it may indicate incorrect use patterns or developing wear that requires closer review under maintenance and replacement signs.
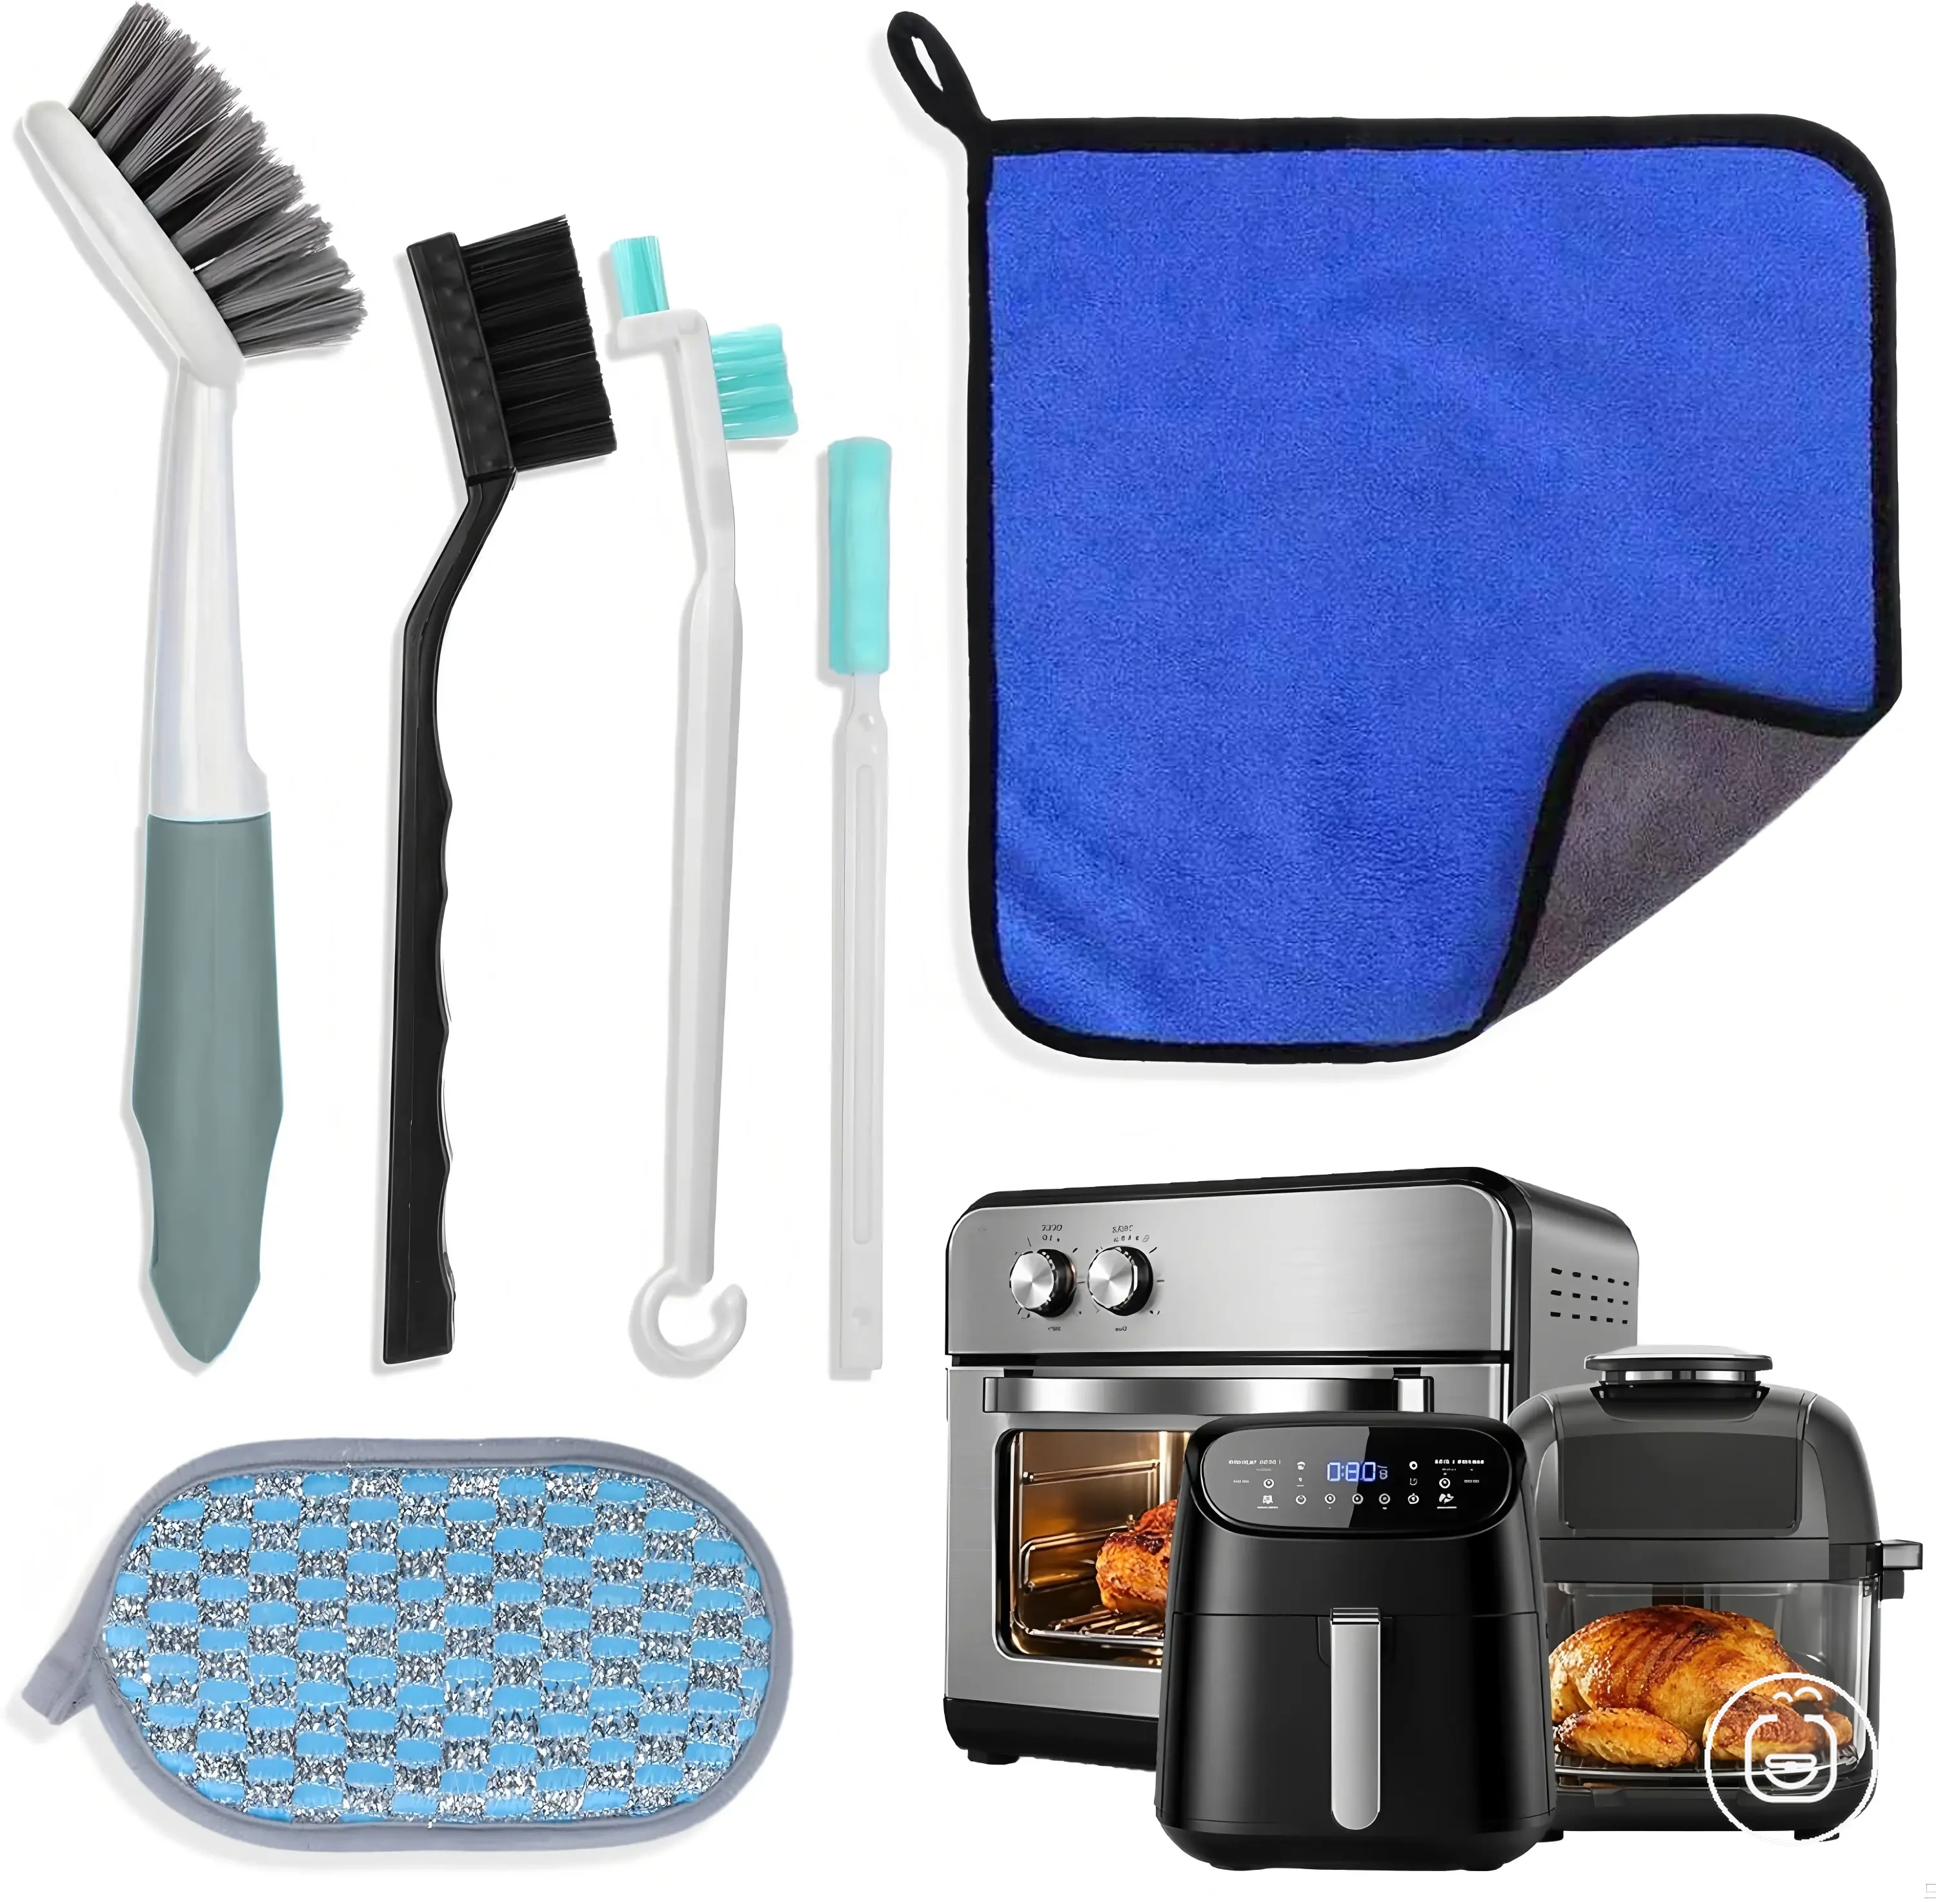
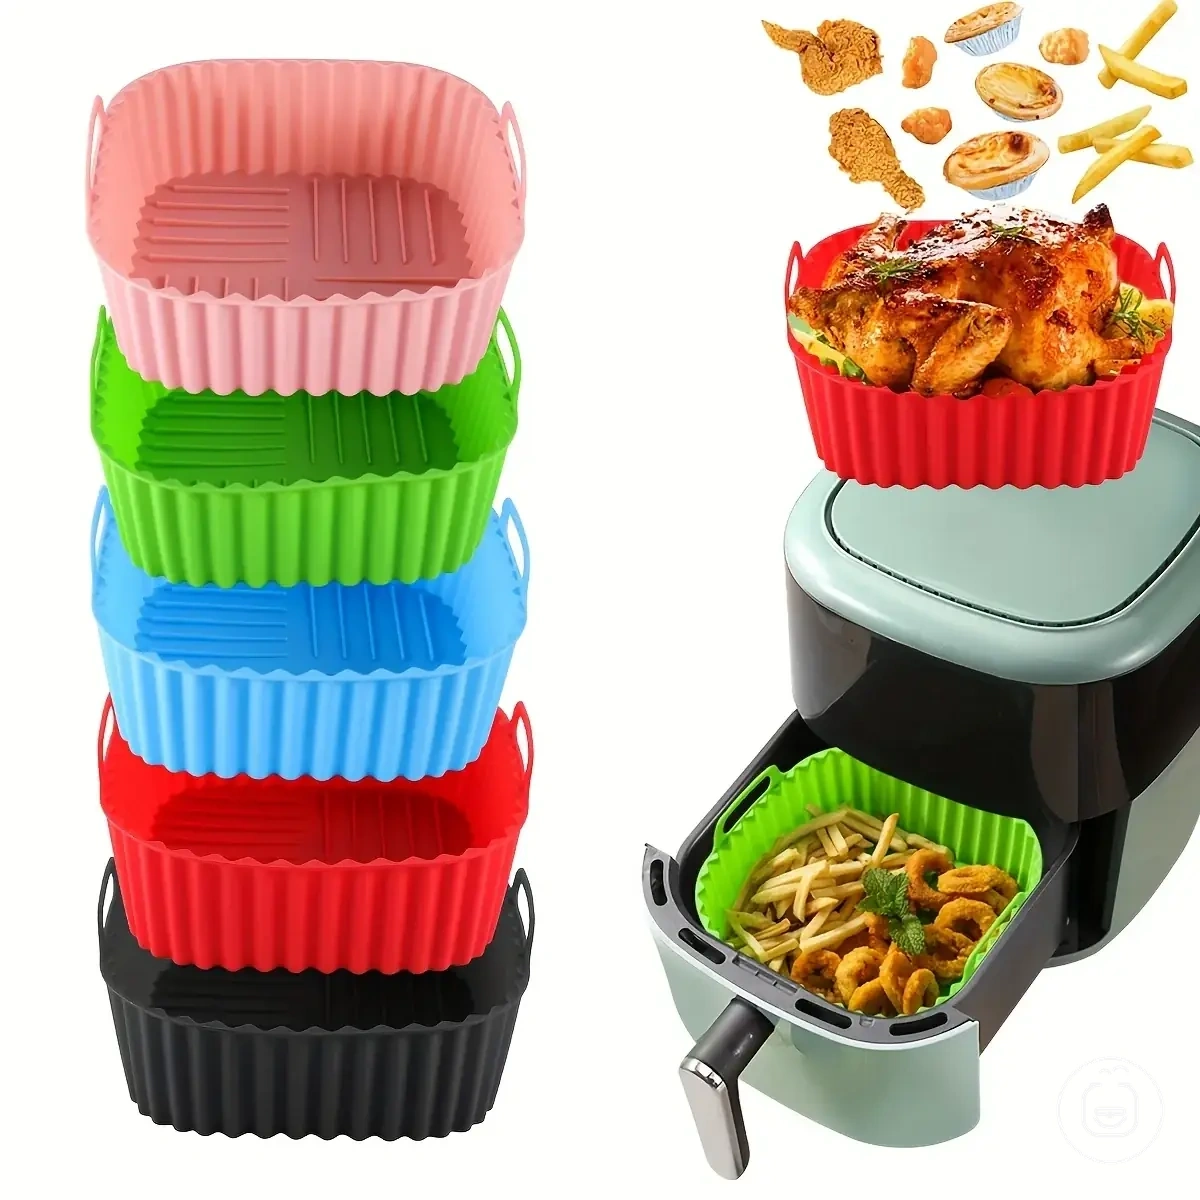
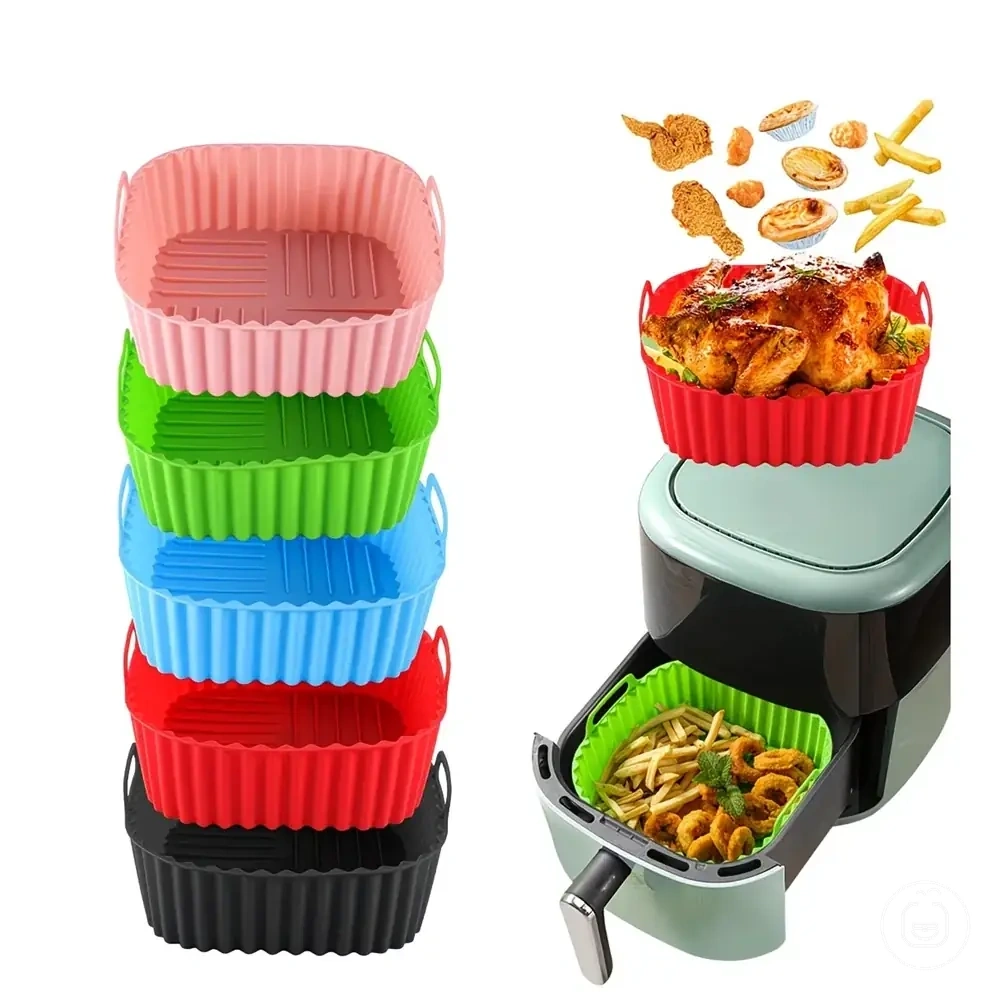
The products below are useful examples for comparing available options. Before buying, check that the compatibility criteria, key features, and product details match your needs.
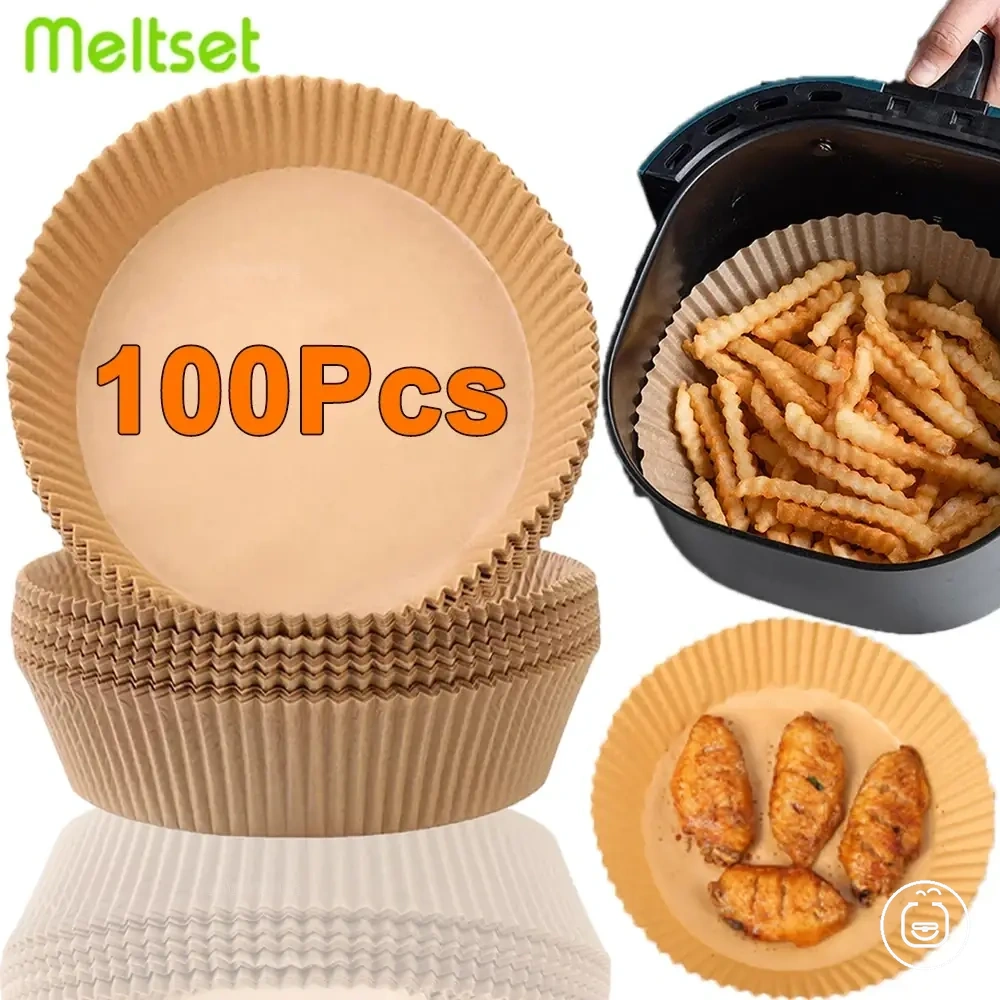
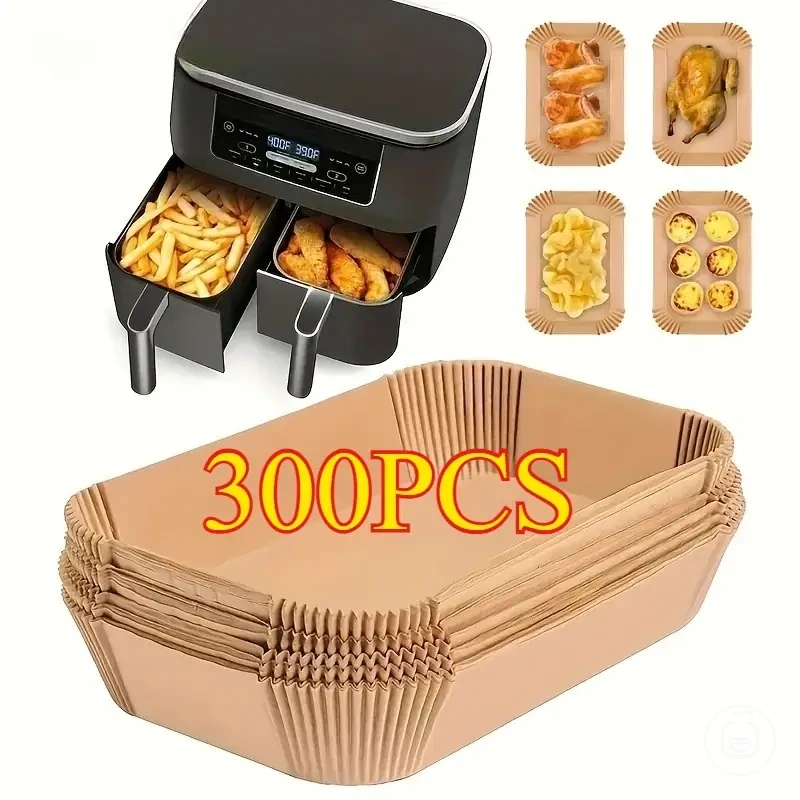
This chart shows the key adjustments and maintenance habits to reduce grease buildup between cooking sessions, plus a warning sign for recurring issues.