
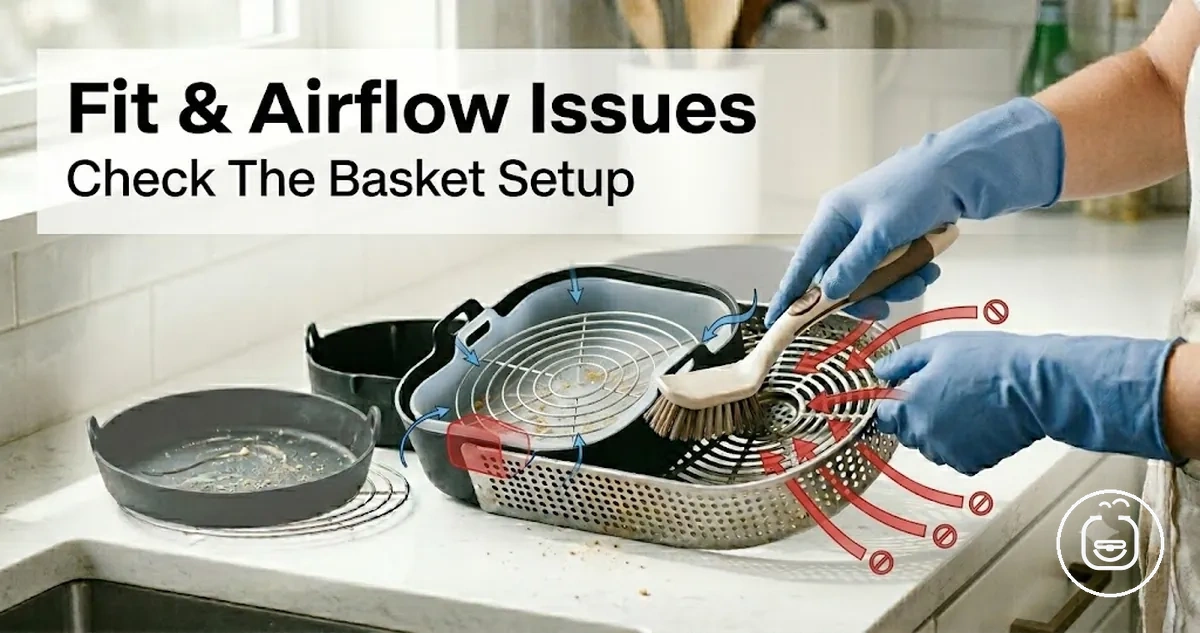
Air Fryer Accessory Problems and Troubleshooting
Air fryer accessories are add-ons such as liners, racks, trays, and basket inserts that support cooking inside the air fryer basket. Accessory problems usually come from fit issues, restricted airflow, heat contact, residue buildup, coating wear, or odor changes that affect performance and safety signals in different ways.
In many cases, users notice uneven cooking, movement inside the basket, or residue marks and assume the air fryer itself is faulty. However, these situations often relate to how a liner, rack, tray, or basket insert interacts with airflow and placement inside the basket. At the same time, some issues can come from the appliance, especially when heating or circulation behaves abnormally even without accessories. Separating accessory-related faults from appliance-level faults is important before deciding the next step.
Accessory problems usually appear through visible or sensory changes such as shifting inserts, blocked airflow patterns, uneven browning, or residue accumulation on surfaces. These signs help narrow down whether the issue is linked to fit, material condition, or placement rather than cooking settings alone. Diagnosis typically moves from observed symptoms toward understanding whether the cause is mechanical positioning, airflow restriction, or surface condition rather than assuming a single universal reason.
Stop using an accessory when there are clear signs of burning, persistent smoke, strong plastic or silicone odor after repeated use, or visible coating damage such as peeling or bubbling. Loose or unstable fit that repeatedly affects safety or airflow can also indicate that the accessory should not continue to be used in its current condition. These cases require caution because continued use may increase residue buildup or heat contact risks.
For broader context on how different add-ons relate to fit, airflow, and material behavior, the air fryer accessories hub provides an overview of accessory categories and their roles inside the cooking system.
Symptoms that point to an air fryer accessory problem
When uneven cooking, burning edges, or liner movement occurs, it is often a symptom that points to an air fryer accessory problem rather than a cooking setting issue. These signs usually relate to fit, airflow, residue, coating wear, or basket insert positioning and should be treated as cues rather than final proof.
Symptoms that point to an air fryer accessory problem help identify whether liners, racks, trays, or basket inserts are affecting performance through airflow or placement issues. 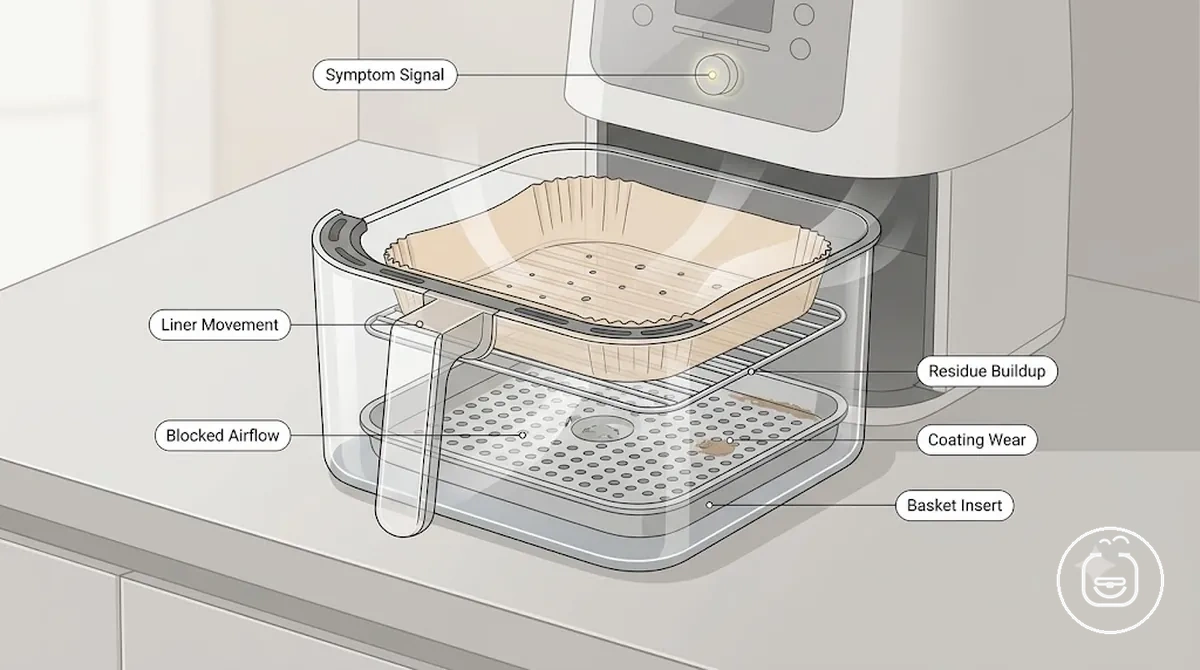 The image highlights liner position, rack seating, blocked airflow areas, and residue cues inside the basket to show how symptom patterns form when fit or circulation is disrupted.
A symptom-based check helps separate accessory-related cues from general cooking variation by grouping signals before any conclusion is made. This stage focuses on how each symptom relates to fit, airflow, heat, residue, and wear so the next diagnostic direction stays structured.
Some borderline cases occur when first-use odor, slight placement errors, or temporary buildup mimic more persistent issues. These situations should be compared across repeated uses before assuming a consistent accessory problem pattern or moving toward replacement decisions.
- Uneven cooking — often linked to liner movement or blocked airflow — check basket insert alignment
- Liner movement — usually related to poor seating — check fit against basket edges
- Burning edge — may come from heat contact or restricted circulation — check airflow gaps near rack or tray
- Blocked airflow — often caused by covered holes or tight placement — check vent exposure
- Persistent smell — may relate to residue or buildup — check cleaning level and leftover grease
- Residue buildup — can indicate stuck food or overheating — check surface condition of accessories
- Coating wear — may lead to sticking or uneven browning — check for scratches or peeling on inserts
Fit and seating problems with liners, racks, trays, and basket inserts
Fit and seating problems happen when liners, racks, trays, or basket inserts do not align properly inside the air fryer basket. This mismatch affects how securely the accessory sits, often leading to movement, tilting, or reduced function during cooking.
These air fryer accessories depend on correct fit to stay stable during airflow and heating. When the size or shape does not match the basket style, the accessory may lift, shift, or scrape against the sides or drawer area. In many cases, this leads to uneven seating and reduced cooking consistency, especially when airflow clearance is restricted. The main factors involved are size, shape, depth, and basket style compatibility.
A quick way to understand recurring fit issues is to compare how different accessory types behave when seating is not aligned properly. For a deeper breakdown of sizing and mismatch patterns, see fit and compatibility problems. These criteria help separate too-large, too-loose, wrong-shape, and warped accessory conditions before moving to detailed diagnosis.
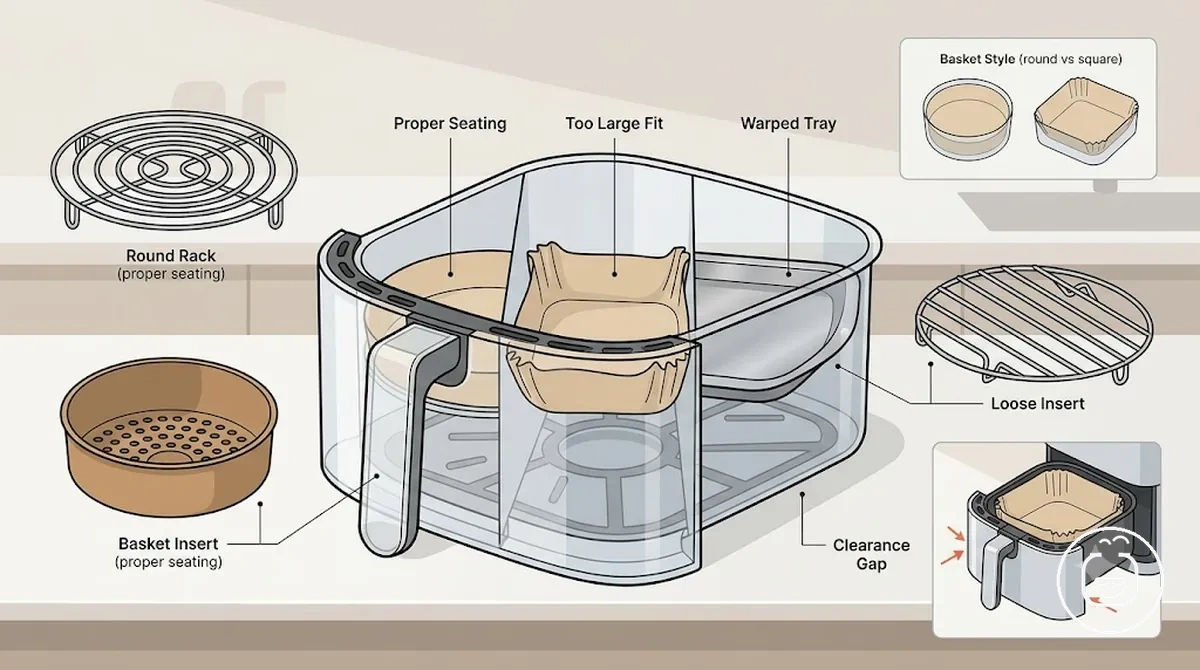
- Size mismatch — measurement off (too large/small) — check if edges lift or overlap basket walls
- Loose seating — basket insert not stable — check movement during drawer sliding
- Wrong shape — round vs square mismatch — check alignment with basket style
- Warped accessory — uneven base or tray bending — check flat contact with basket bottom
- Clearance issue — rack height too high — check drawer closure and internal space
- Material condition — bent or worn edges — check stability during airflow
Sometimes accessories appear to fit but still cause minor shifting or uneven contact, especially when trays or liners are slightly warped or when basket inserts sit loosely after repeated use. These near-fit cases often create subtle movement or scraping that becomes noticeable only during airflow circulation and heating cycles.
Wrong size, shape, or basket style
Wrong size, shape, or basket style causes liners, racks, trays, and basket inserts to sit incorrectly inside the air fryer basket. This leads to unstable fit and reduced seating performance during use.
Size, shape, and basket style determine whether an accessory sits flat and stays aligned during operation. Wrong size, shape, or basket style is best understood by comparing how geometry affects seating inside the basket structure.
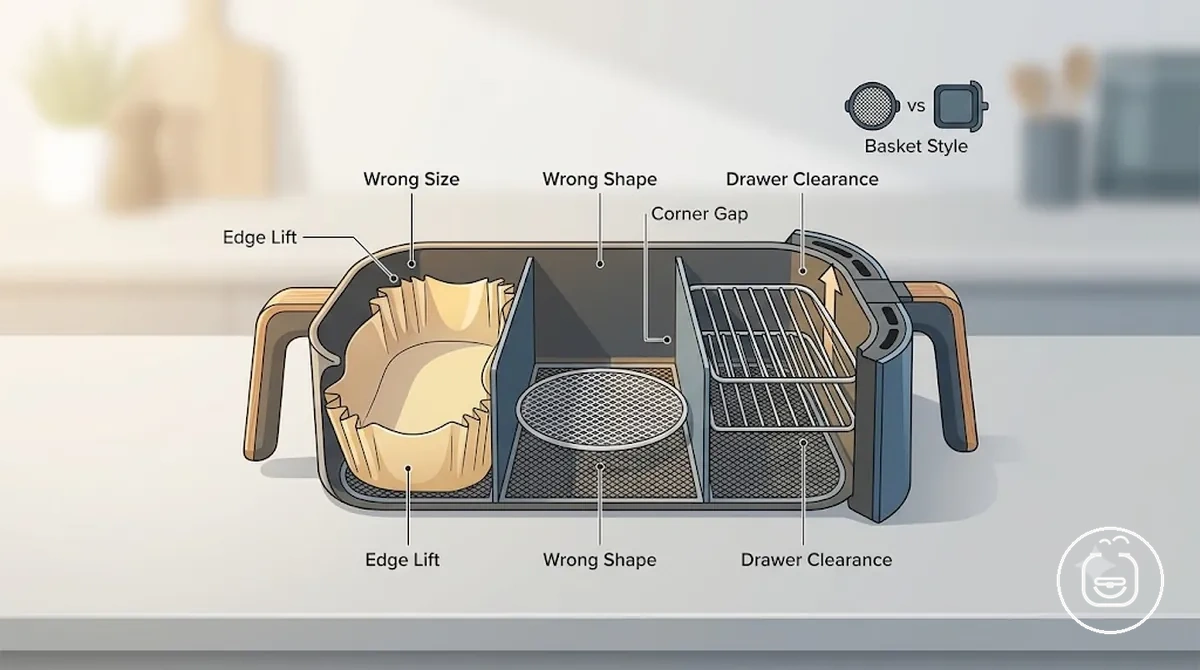
- Diameter — too large or too small — causes edge lift or unstable base fit
- Width — mismatch with basket interior — leads to side pressure or shifting
- Corner shape — round vs square mismatch — creates gaps or uneven seating
- Sidewall height — too tall for basket depth — causes tilt or airflow restriction
- Handle clearance — interference with basket path — leads to drawer resistance
- Drawer closure — obstruction from poor fit — prevents smooth closing
Some accessories may still appear usable at the base but fail at the edges when geometry does not align. This often happens with oven-style inserts or generic liners that match the bottom surface but conflict with basket walls or overall basket style.
Loose liners, unstable inserts, and misaligned trays
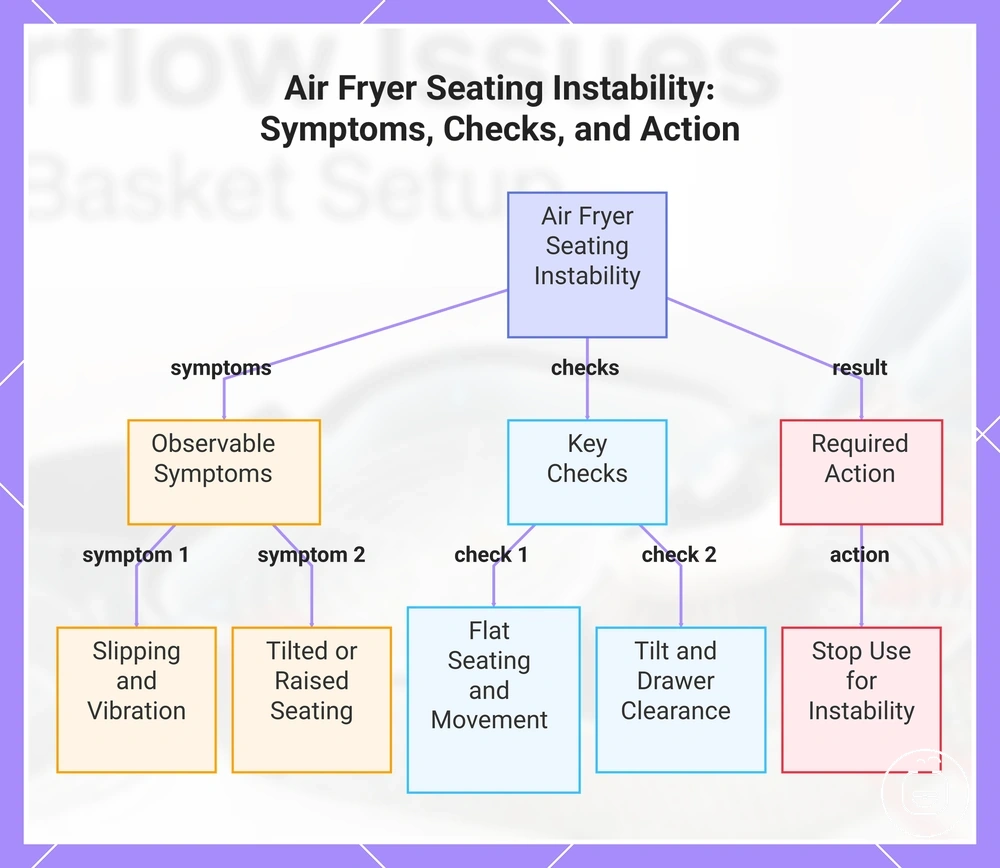
A loose liner, unstable insert, or misaligned tray can create seating instability inside the air fryer basket even when the accessory appears to fit. This condition often leads to slipping, vibration, or uneven contact during operation. The result is usually loose, raised, or tilted seating that reduces stable performance during use.
A loose liner may shift when food weight is added. An unstable insert can tilt during airflow or heating cycles. A misaligned tray may scrape or block drawer movement if contact points are uneven. When these conditions repeat during use, especially under heat, it is a sign that the accessory should be stopped from use due to instability risk.
Seating stability depends on whether the accessory remains flat, aligned, and secure under load and heat conditions.
- Flat seating — check if liner or insert stays level without lifting at edges
- Movement during loading — check for slipping when food is added
- Tilt or raise — check if tray or insert shifts upward or leans under heat
- Drawer movement — check if misalignment causes scraping or resistance
- Contact risk — check for vibration or unstable touch points during operation
This chart shows common symptoms, key checks, and the required action for identifying seating instability caused by loose liners, unstable inserts, or misaligned trays in an air fryer.
Airflow problems from blocked or crowded accessories
Airflow problems from blocked or crowded accessories occur when liners, racks, trays, or food loads restrict hot air circulation inside the air fryer basket. This restriction reduces airflow and can lead to uneven cooking results, especially when spacing or venting is affected. In many cases, airflow becomes a conditional cause of slower cooking or reduced crispness.
Blocked airflow often happens when a solid liner covers perforated openings, when a rack is overcrowded with stacked layers, or when a tray limits spacing between food items. These conditions can result in uneven browning, moisture retention, or reduced crispness. However, similar outcomes may also appear due to normal recipe timing or food variation, so the key is to identify whether restriction is caused by placement or load rather than cooking settings alone.
The table below organizes airflow problems by accessory condition and cooking result. It helps separate blocked airflow from normal variation by linking accessory structure to cooking outcomes. The evidence to check is spacing, perforated liner exposure, and load distribution inside the basket.
| Accessory condition | Airflow issue | Cooking symptom | Check or adjustment |
|---|---|---|---|
| Liner | Covered perforated openings / solid liner effect | Slower cooking, reduced crispness | Check airflow through openings and liner placement |
| Rack | Stacked layers / overcrowding | Uneven browning | Check spacing between food layers |
| Tray | Reduced hot air circulation due to crowding | Moisture retention, soft texture | Check food distribution and spacing |
| Insert | Blocked airflow paths | Uneven heating zones | Check alignment and airflow gaps |
| Food load | Poor spacing / overcrowding | Reduced crispness, uneven results | Check load distribution inside basket |
Airflow effects vary depending on basket design, accessory type, and food volume, especially when liners or racks change spacing or block perforation points. In practical use, evaluating airflow during use helps distinguish normal recipe variation from true airflow restriction caused by accessories.
Solid liners, covered holes, and stacked racks
Solid liners, covered holes, and stacked racks affect airflow by changing how open or restricted the air path is inside the air fryer basket. A solid liner reduces airflow by covering perforated openings, while stacked racks reduce clearance and limit vertical circulation between layers. These conditions create partial or full airflow restriction depending on basket design and food load.
A solid liner blocks or partially blocks perforated openings, which can reduce circulation and impact crispness. A perforated liner may still allow airflow, but the effect depends on how much of the opening remains exposed during cooking. Stacked racks introduce vertical layering that reduces spacing, which can slow cooking or reduce crispness when airflow is restricted or uneven across layers. The final result varies with clearance, load distribution, and tray positioning inside the basket.
Airflow restriction is not identical in every setup, so the same accessory can behave differently depending on design and usage conditions.
| Acceptable restriction | Perforated liner or rack with adequate clearance and partial airflow maintained |
| Performance-limiting restriction | Reduced airflow due to partial coverage or moderate stacking leading to slower cooking or reduced crispness |
| Stop-use condition | Severe blockage where covered holes and tight stacking significantly restrict airflow and cause uneven cooking |
Slow cooking, uneven browning, and lost crispness
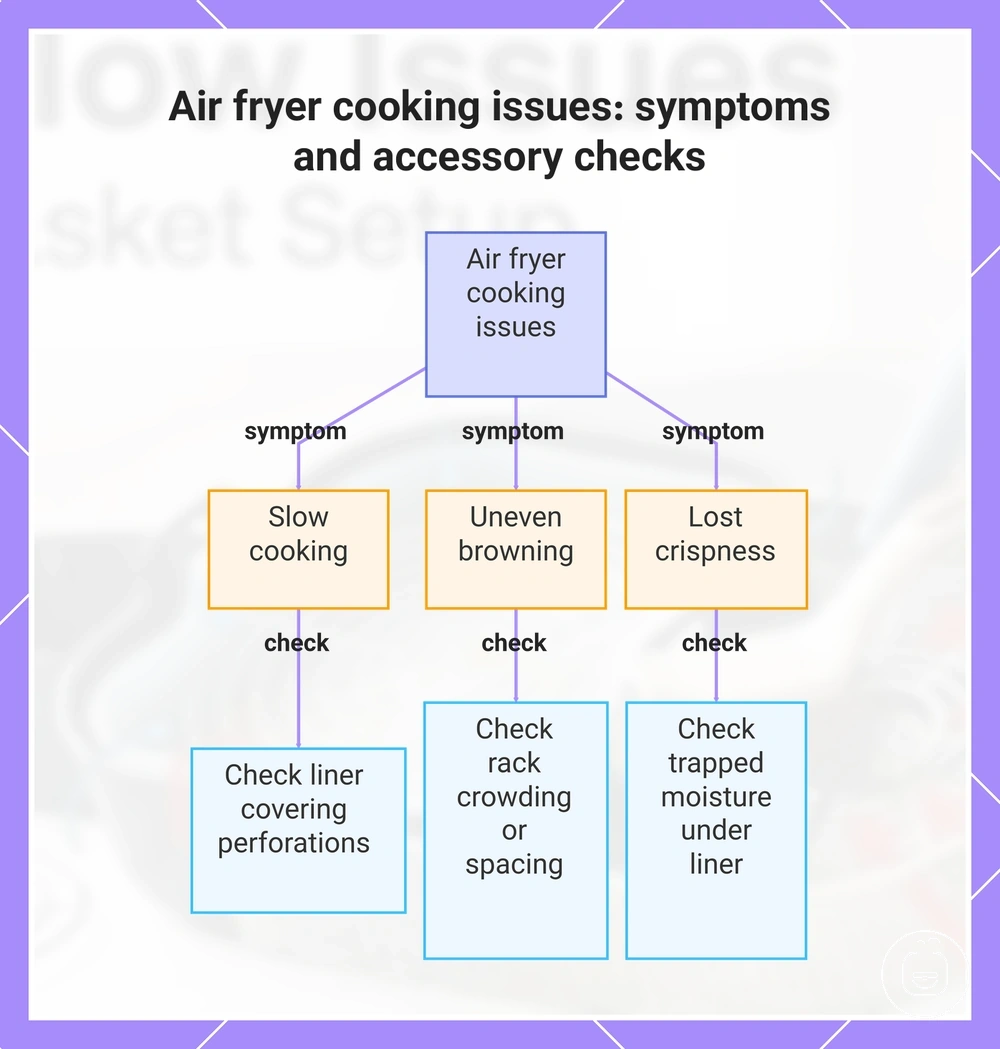
Slow cooking, uneven browning, and lost crispness can occur when accessory placement or crowding disrupts airflow inside the air fryer basket. These outcomes are not only tied to recipe timing, but also to how liners, racks, or trays interact with airflow and food spacing. When circulation is limited, heat distribution becomes uneven, which may lead to slower cooking and reduced surface texture quality.
These symptoms can also result from food thickness, moisture levels, or insufficient shaking, so accessory-related causes should be verified rather than assumed. A soggy bottom may indicate moisture trapped under a liner or tray, while a pale surface can suggest reduced exposure to circulating air. Uneven browning often appears when a rack is crowded or spacing across the food load is inconsistent, but similar patterns may also come from ingredient variation. Verification depends on checking whether the liner, rack, or tray is actually restricting airflow or crowding the basket.
Use the diagnostic list below to connect cooking results with likely accessory-related conditions and identify verification cues:
- Slow cooking — check liner covering perforations or restricted airflow from solid placement
- Uneven browning — check rack crowding or uneven spacing of food load
- Lost crispness — check trapped moisture under solid liner or dense tray setup
- Soggy bottom — check tray contact blocking airflow beneath food
- Pale surface — check reduced airflow exposure due to liner or covered openings
Accessory influence should be separated from normal food variability. When the same slow cooking, uneven browning, or lost crispness occurs consistently with the same liner, rack, or tray setup, airflow or crowding is more likely contributing than ingredient differences alone.
This chart shows the three main cooking issues caused by airflow disruption in an air fryer and the corresponding verification checks for accessory-related causes.
Liner movement, burning, and heating-element contact
Liner movement near the heating element can create a direct safety risk when a lightweight liner shifts during airflow and comes too close to heat sources. This condition should be treated as a stop-use signal when burning, smoke, or visible contact occurs. :contentReference[oaicite:0]{index=0}
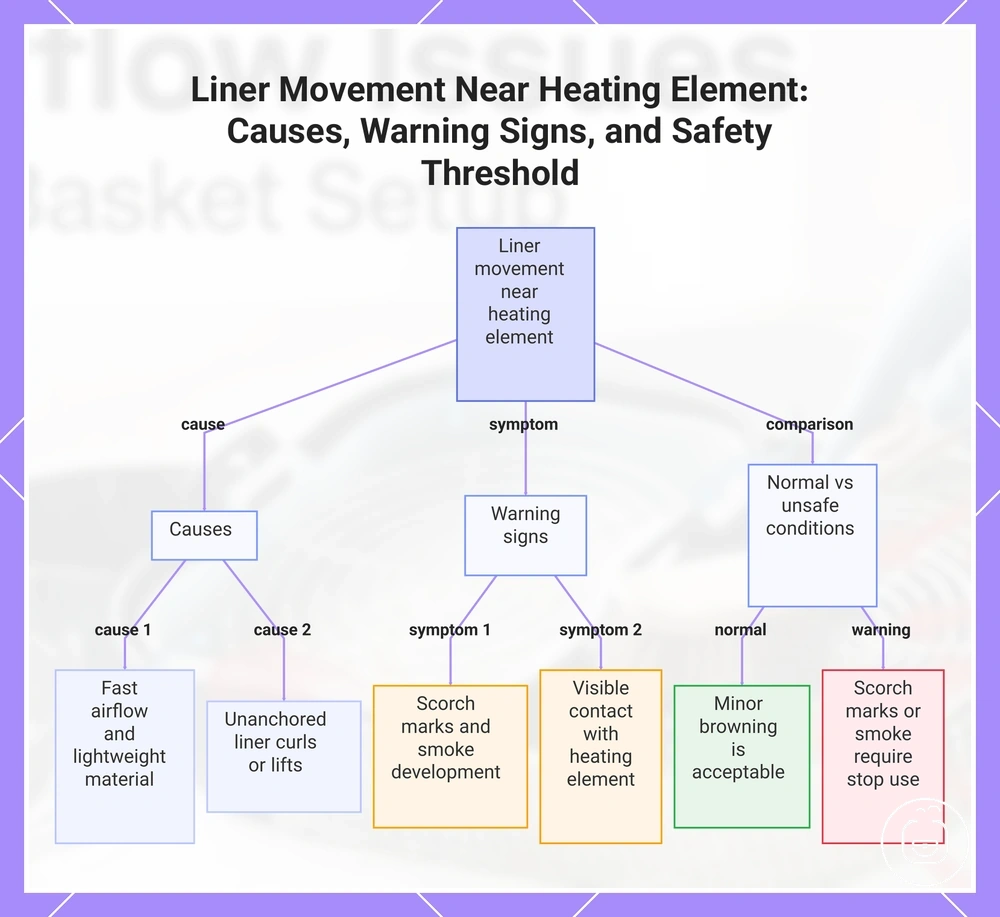
Liner movement is influenced by fast airflow, lightweight liner material, and how the liner is positioned relative to the heating element. When a paper liner is not anchored by food weight or proper placement, it may lift, curl at the edges, or move unpredictably during operation. This increases heat exposure and can lead to scorch marks, smoke development, or direct contact with the heating element. In higher-risk cases, this shifts into burning conditions where material safety becomes critical, and the risk of airflow-driven lifting increases edge curl and contact risk.
The following caution checklist helps identify early warning signs before heat-related damage escalates. The guidance should be evaluated alongside material safety checks to ensure correct usage boundaries and heat-resistance understanding.
- Preheating without food weight — check if liner lifts or moves freely
- Food anchoring — check whether food holds liner edges in place
- Edge clearance — check distance from heating element and top airflow zone
- Heat exposure — check for curling or early scorch marks
- Smoke development — check for burning smell or visible smoke
- Stop use condition — check repeated movement, burning, or contact risk
Minor browning at edges may occur under normal heat exposure, especially with high airflow, but it differs clearly from scorch marks, smoke, or burning smell. When liner movement becomes frequent or heating-element contact is suspected, it indicates a shift from normal variation to unsafe conditions that require stopping use.
This chart shows the main causes of liner movement near a heating element, the warning signs that indicate a safety risk, and the key distinction between normal browning and conditions that require stopping use.
Empty or lightweight liners that lift during preheating
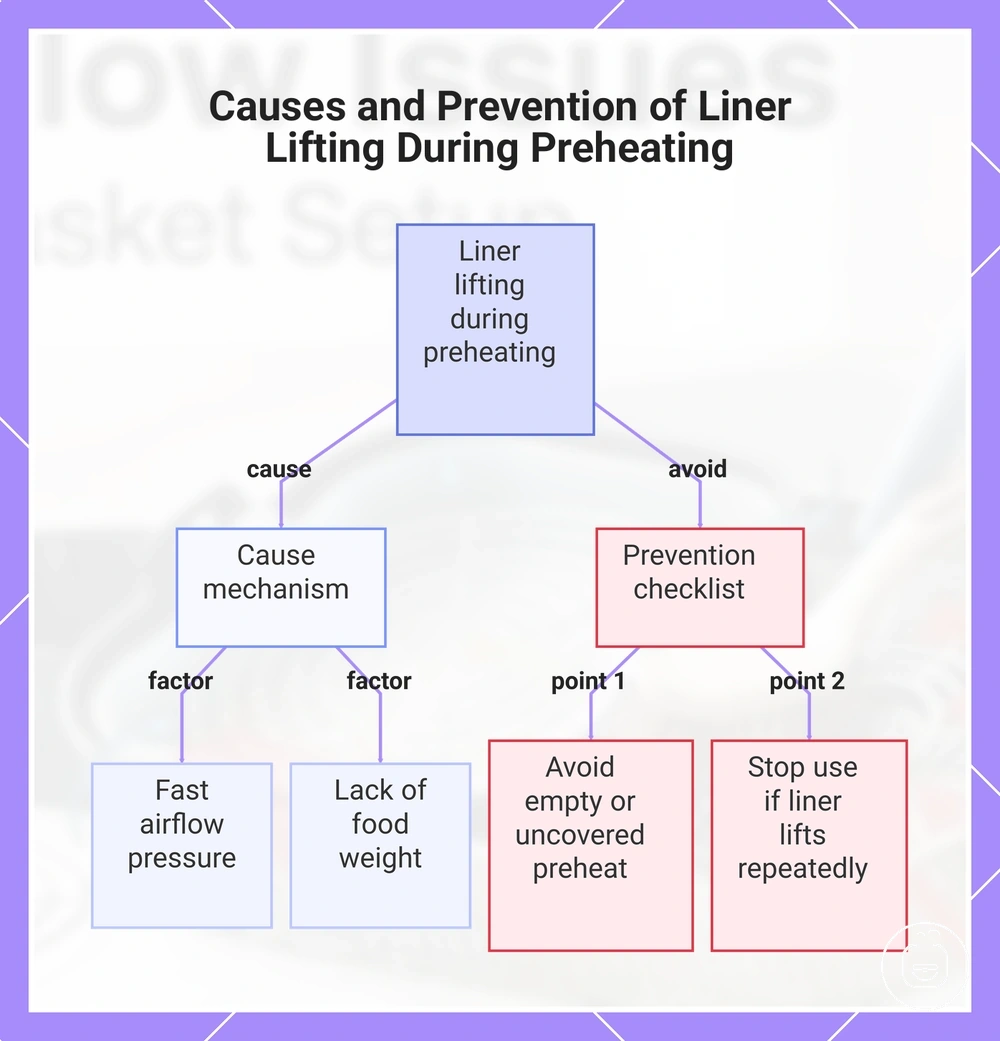
Empty or lightweight liners can lift during preheating when fast airflow combines with lack of food weight inside the basket. This happens when a paper liner or lightweight liner is not anchored, allowing it to lift, fold, or move toward the heating element under circulating hot air. This condition is driven by fast airflow and lack of food weight.
This lifting mechanism is usually driven by imbalance between airflow pressure and insufficient load. When empty or partially covered, fast airflow pushes upward, and the absence of food weight reduces anchoring. As a result, the liner may shift, fold, or move closer to the heating-element contact zone, increasing instability during preheating, so avoid preheating with an empty liner or uncovered basket.
Do-not checklist for liner lifting during preheating:
- Empty preheat — do not run preheating with an empty liner inside
- Uncovered liner area — do not leave edges without food weight anchoring
- Light food load — do not rely on snacks that cannot hold liner in place
- Edge lift — do not continue use if liner corners repeatedly rise
- Stop-use signs — do not ignore repeated folding, lift, or heating-element contact risk
Light snack portions such as small or unevenly distributed foods may also fail to stabilize a lightweight liner during preheating. In these cases, the liner can lift intermittently or fold at the edges until sufficient food weight anchors it, especially under fast airflow conditions.
This chart explains the causes of liner lifting during preheating and the key prevention steps to avoid it.
Oversized paper, curled edges, and high-heat conditions
Oversized paper liners can create risk when edge clearance is reduced and heat exposure increases during operation. When a paper liner extends beyond the basket or curls upward under high heat, it may shift from stable placement to exposed edge conditions that can interact with airflow and heating zones. This often leads to oversize, curling, or heat exposure that increases scorch or contact risk.
:contentReference[oaicite:0]{index=0} Risk increases when oversized paper, curled edges, and insufficient edge clearance combine under high-heat conditions. A paper liner with limited heat tolerance or incorrect placement may overhang the basket, and as edges curl upward, they can move into hotter airflow paths. This may result in exposed edges that show scorching or create potential contact risk depending on appliance design and airflow strength.
Risk checklist for oversized paper and edge behavior:
- Oversized paper — check if liner extends beyond basket edge and creates overhang
- Curled edges — check if paper lifts or curls upward during heating
- High heat exposure — check if liner shows early signs of scorching
- Edge clearance — check if exposed edges move toward heating zones
- Contact risk — check if lifted liner approaches heating element area
In some cases, dry cooking conditions or shrinking food load can expose more of the liner surface, allowing edges to lift or shift more easily. When this happens, curled or overhanging sections may become more sensitive to heat exposure, increasing the chance of scorch formation or unstable edge behavior under airflow.
Cleaning problems caused by grease, residue, and stuck food
Cleaning problems caused by grease, residue, and stuck food occur when air fryer accessories develop layered buildup on nonstick surfaces, joints, or textured areas after repeated cooking cycles. High-fat cooking and repeated exposure to heat can increase adhesion, making residue harder to remove over time and affecting surface texture, grease, residue, and stuck food behavior. :contentReference[oaicite:0]{index=0}
These cleaning problems often build gradually as grease film bonds with baked-on food or carbonized spots, especially on reusable liner, rack, and tray surfaces. Sticky silicone areas or worn nonstick surface coatings may also hold odor and trapped particles, increasing cleaning difficulty. In many cases, this creates cleaning difficulty that should be distinguished from actual damage risk such as coating breakdown or persistent odor that affects future cooking performance.
The table below organizes cleaning problems by accessory type and residue pattern. It separates how grease, residue, and stuck food interact with different surfaces and how this affects cleaning effort and potential damage risk.
This structure helps identify whether buildup is still within normal maintenance range or has progressed into persistent residue conditions that require closer inspection. In some cases, residue accumulation and odor signals may indicate deeper maintenance concerns beyond surface cleaning, which can be reviewed through cleaning issues when diagnosing recurring buildup patterns.
| Accessory type | Residue pattern | Cleaning risk | Safer response |
|---|---|---|---|
| Reusable liner | Sticky grease film and trapped crumbs | Moderate buildup, odor retention | Check material-safe cleaning compatibility |
| Rack | Trapped crumbs and baked-on food in joints | Higher cleaning effort in crevices | Inspect joint buildup after use cycles |
| Tray | Baked-on food on nonstick surface | Risk of surface wear over time | Check coating condition before reuse |
| Insert | Carbonized spots and grease accumulation | Uneven residue removal difficulty | Monitor buildup in airflow-contact areas |
| Nonstick surface | Layered grease and residue film | Reduced nonstick performance over time | Assess texture changes and adhesion levels |
Reusable liners, racks, and trays that hold buildup
Reusable liners, racks, and trays that hold buildup are reusable air fryer accessories where grease and residue gradually collect on silicone folds, rack joints, perforations, and tray corners after repeated cooking cycles. :contentReference[oaicite:0]{index=0} This buildup is typically linked to repeated exposure to grease, trapped crumbs, and stuck food that remain on textured or joined surfaces over time, especially in areas where cleaning access is limited.
These reusable accessories tend to develop layered buildup when grease film and food particles settle into seams, holes, and flexible material folds. Over time, rack joints and perforations can retain crumbs, while tray corners may hold baked-on residue that becomes harder to remove. In some cases, this buildup may contribute to odor or smoke during reheating, depending on cooking frequency and residue level.
The following maintenance checklist highlights common buildup locations and observable conditions:
- Silicone liner folds — check for trapped grease and sticky residue accumulation
- Perforations — check for stuck food particles reducing residue release
- Rack joints — check for trapped crumbs and compacted buildup
- Tray corners — check for baked-on residue concentration zones
- Odor or smoke cues — check if repeated heating activates retained buildup
Cleaning methods that damage nonstick surfaces
Aggressive cleaning methods can damage a nonstick surface when abrasion or harsh treatment is applied repeatedly during maintenance, especially through abrasive pad use, metal tool contact, or harsh chemical exposure that affects the coating structure. This aggressive cleaning can lead to scratch formation, peeling edges, sticking behavior, and broader coating damage depending on how often the surface is stressed during use.
What to avoid on a nonstick surface depends on accessory instructions and coating condition, but abrasive pad scrubbing, metal tool scraping, and harsh chemical exposure are common triggers of surface wear. These actions can increase scratch development and coating damage over time, which may later contribute to sticking and peeling during cooking use rather than removing residue effectively.
Gentle cleaning methods reduce direct friction on the coating, while aggressive cleaning increases mechanical and chemical stress on the surface. Soft wiping and low-friction contact are generally less likely to affect the coating compared to abrasive or high-force methods, especially when the nonstick surface already shows early wear.
- Abrasive pad — may cause scratches on the nonstick surface and lead to peeling over time
- Metal tool — can create coating damage and increase sticking during cooking use
- Harsh chemical — may stress the coating and contribute to surface wear and sticking behavior
- Excessive scrubbing — may weaken the coating layer and increase scratch formation and peeling risk
Odor and material damage after accessory use
Odor and material damage after accessory use refers to situations where smell changes, discoloration, or visible surface wear suggest that an air fryer accessory may be experiencing material-related issues after repeated heating cycles. :contentReference[oaicite:0]{index=0} These signs can include odor signals such as plastic smell, silicone smell, or burnt smell, alongside physical indicators like peeling, bubbling, scratches, or coating changes, and they need to be read separately as smell-based cues versus visible material damage.
These conditions often appear when reusable accessories are exposed to repeated heat, residue buildup, or uneven cleaning over time. Odor signals may come from new appliance off-gassing, leftover food residue, or overheated materials, while visible changes are more often linked to coating wear, surface stress, or localized overheating effects. In many cases, these sources overlap, but they can be grouped into smell-based cues, surface discoloration, and coating-related changes to better understand likely origin patterns.
The table below separates odor and damage signs by likely source and the corresponding next action. It helps distinguish whether the issue is primarily smell-based or linked to physical surface changes such as coating or structure wear.
| Sign | Likely source | Check | Safer next action |
|---|---|---|---|
| Plastic smell | New appliance or early use heating | Usage duration and first-cycle behavior | Monitor if it reduces over time |
| Burnt smell | Food residue or overheating contact | Recent residue or heating exposure | Clean and reassess before reuse |
| Discoloration | Heat stress or repeated use wear | Surface uniformity and heat zones | Monitor for progression |
| Scratches | Mechanical contact or abrasive handling | Surface texture changes | Reduce harsh contact methods |
| Peeling or bubbling | Coating stress or overheating cycles | Coating integrity and spread | Consider replacement if it expands |
In practical use, odor changes alone may not always indicate material damage, especially during early use phases, while combined signals such as persistent burnt smell with peeling or bubbling coating often indicate stronger material-related concerns. In such cases, decisions typically depend on whether the condition remains stable after cleaning or continues to progress with further use, which can guide whether continued use or replacement is more appropriate.
Plastic, silicone, or burnt smells from accessories
Plastic, silicone, or burnt smells from accessories refer to different odor patterns that can appear during first use, cleaning cycles, or heat exposure, and each smell type often points to a different material or residue condition. :contentReference[oaicite:0]{index=0} These include plastic smell from new parts or packaging residue, silicone smell from material or cleaning residue, and burnt smell from overheating or liner contact situations.
A plastic smell is commonly linked to new appliance use or remaining packaging residue, while a silicone smell may appear when flexible parts retain residue or cleaning agents. A burnt smell is more often associated with overheated grease, liner contact with heat zones, or accumulated food buildup exposed to high temperatures. Each case should be checked against recent usage patterns to identify whether the odor is temporary or related to repeated heat exposure.
To separate temporary and persistent odor behavior, it is useful to check whether the smell reduces after cleaning and ventilation or continues across multiple cooking cycles. Persistent odor can indicate repeated residue heating or ongoing contact conditions, while short-term first-use smells are often linked to initial material settling.
Smell-source checklist:
- Plastic smell — likely new parts or packaging residue; verify if it decreases after initial uses
- Silicone smell — likely cleaning residue or material retention; verify after washing and airing out
- Burnt smell — likely overheated grease or liner contact; verify by checking recent heating exposure
- Packaging residue smell — likely leftover protective materials; verify if all packaging was removed
- Overheated grease smell — likely buildup on basket or tray surfaces; verify by inspecting residue accumulation
- Persistent odor — likely repeated heating of residue; verify across multiple cycles after cleaning
Peeling coating, scratches, bubbling, and discoloration
Peeling coating, scratches, bubbling, and discoloration on a tray, pan, rack, or insert indicate visible nonstick surface degradation and act as a reuse decision signal rather than a cosmetic observation. These conditions often correlate with coating wear that may increase sticking and reduce surface consistency, so they should be evaluated as a replacement cue when changes progress or expand over time.
Surface damage varies in severity. Discoloration may remain limited to superficial staining, while scratches, bubbling, and peeling coating often suggest deeper coating disruption. In some cases, light discoloration does not immediately change performance, but when bubbling or flaking appears, it can indicate weakening surface stability on the nonstick surface of the tray, pan, or rack. The key distinction is whether the change remains superficial or shows active coating breakdown linked to sticking behavior.
A severity-based view helps separate cosmetic change from functional surface failure.
Severity levels for coating condition:
- Discoloration — cosmetic stain; check if surface remains smooth and non-sticking
- Light scratches — minor coating wear; check if sticking begins to increase
- Deep scratches — coating penetration; check for repeated sticking on affected areas
- Bubbling — heat or coating instability; check for surface deformation or weakening
- Active flaking — coating breakdown; replacement cue due to increasing surface loss
When peeling coating or flaking expands or combines with bubbling and persistent sticking, it generally indicates ongoing surface degradation where continued use may lead to inconsistent performance, making replacement more appropriate than continued use under worsening conditions.
Decision cues for adjustment, cleaning, replacement, or appliance checks
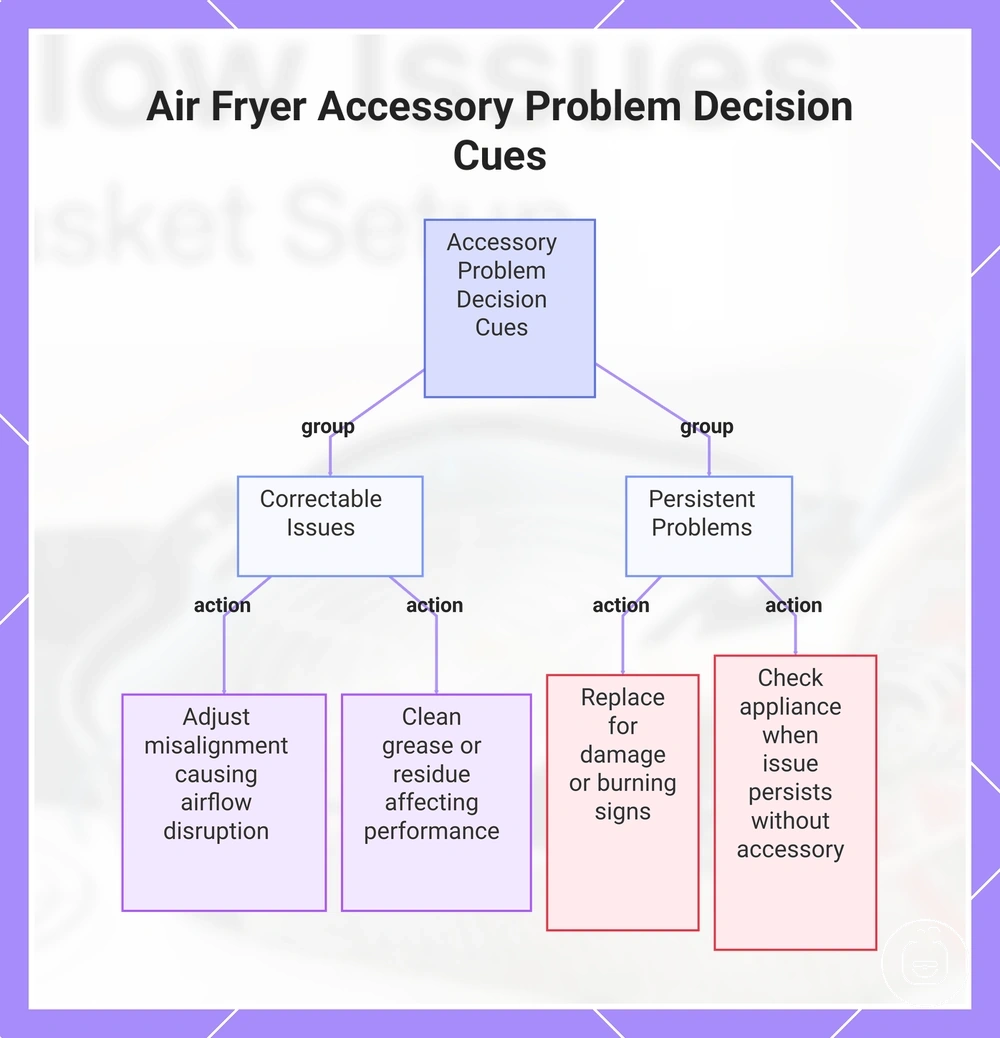
Decision cues for adjustment, cleaning, replacement, or appliance checks help determine the next action after identifying an accessory-related problem in the air fryer setup. :contentReference[oaicite:0]{index=0} These cues separate correctable issues from persistent problems that may require stopping use or checking the appliance itself, based on how the accessory behaves during operation.
Adjustment, cleaning, replacement, and appliance checks form four decision paths used to resolve different types of issues. Adjustment is relevant when problems can be corrected through reseat, resize, or change placement of the accessory. Cleaning applies when residue, grease, or odor buildup affects performance and can be resolved gently. Replacement becomes relevant when wear, damage, or recurring failure creates a persistent problem, while appliance checks are needed when the issue continues even without the accessory and may require manufacturer guidance to rule out deeper appliance-level causes.
The checklist below organizes decision signals into clear action paths so that each problem can be mapped to a suitable response without overlap between accessory and appliance-level issues.
Decision checklist for adjustment, cleaning, replacement, and appliance checks:
- Problem: misalignment or loose fit | Decision cue: airflow disruption or instability | Next action: adjustment via reseat, resize, or change placement
- Problem: grease, residue, or odor buildup | Decision cue: reduced performance or visible contamination | Next action: cleaning with gentle residue removal
- Problem: damage, peeling, or burning signs | Decision cue: persistent problem despite correction attempts | Next action: stop using and consider replacement
- Problem: issue persists without accessory present | Decision cue: appliance-level inconsistency | Next action: appliance checks with manufacturer guidance
When symptoms continue across different accessory adjustments and cleaning attempts, the decision shifts toward either replacement or appliance-level evaluation. In such cases, criteria such as persistent malfunction, recurring instability, or repeated performance loss help separate accessory-related issues from deeper appliance behavior, supported by the when accessories need replacement guideline for replacement conditions.
This chart groups accessory-related air fryer problems into correctable issues and persistent problems, showing the recommended action for each condition.
Problems solved by reseating, resizing, or changing placement
Problems solved by reseating, resizing, or changing placement refer to accessory issues where correction is possible only when the accessory is intact and the problem is positional rather than structural or damage-related. Reseating, resizing, or changing placement can resolve clearance, alignment, or seating inconsistencies, but only when the accessory has no damage and the issue is caused by positioning. These actions apply strictly to intact accessories with positional problems.
Adjustment is effective when the issue comes from seating, spacing, or alignment rather than wear or damage. In many cases, simple repositioning can restore proper tray fit, liner alignment, or rack spacing inside the air fryer basket. Choosing between reseating, resizing, or changing placement depends on whether the accessory is not sitting flat, is covering airflow holes, or is affecting clearance due to placement. The corrective cue is whether the problem disappears after correct positioning, confirming it as a positional problem rather than a persistent defect.
The checklist below highlights when adjustment is sufficient and when it should not be applied due to damage or non-positional conditions.
Corrective-action checklist for reseating, resizing, and changing placement:
- Problem: tray not sitting flat | Decision cue: uneven seating or tilt | Next action: reseat until proper alignment is achieved
- Problem: liner covering airflow holes | Decision cue: blocked clearance or misalignment | Next action: resize or change placement to expose liner holes
- Problem: rack crowding food space | Decision cue: reduced spacing or clearance | Next action: change placement to improve airflow and spacing
- Problem: shifted insert during loading | Decision cue: misalignment after setup | Next action: reseat and realign insert position
- Problem: visible damage present | Decision cue: structural or coating issue | Next action: stop adjustment and avoid forcing fit
When adjustment does not resolve the issue after reseating, resizing, or changing placement, the condition is no longer purely positional. In such cases, persistent instability or recurring malfunction without improvement may indicate that corrective positioning is insufficient and further evaluation is required beyond accessory alignment.
Problems that need replacement or appliance-level troubleshooting
Problems that need replacement or appliance-level troubleshooting refer to conditions where repeated failure, structural damage, or appliance behavior changes indicate that accessory adjustment is no longer sufficient. In these cases, the decision typically shifts toward replacement or appliance-level troubleshooting with manufacturer guidance rather than further positional correction attempts.
Adjustment is no longer appropriate when the accessory shows signs of damage or when the same issue continues after reseating, resizing, or changing placement. Conditions such as warped insert, peeling coating, burnt liner marks, basket latch failure, or persistent smell that does not reduce after cleaning suggest a non-positional problem. In some cases, the issue may also persist even without the accessory, which points toward appliance-level troubleshooting rather than accessory correction.
The checklist below defines when to stop adjustment and move toward replacement or appliance-level evaluation.
Stop-use checklist for replacement or appliance-level troubleshooting:
- Repeated liner burning | Decision cue: recurring heat damage despite correct use | Next action: replacement and stop using accessory
- Active flaking coating | Decision cue: visible material breakdown during operation | Next action: replacement consideration
- Warped insert or basket latch failure | Decision cue: structural fit or locking instability | Next action: replacement or manufacturer guidance
- Persistent smell after cleaning | Decision cue: odor continues across multiple cycles | Next action: appliance-level troubleshooting
- Problem continues without accessory | Decision cue: appliance shows inconsistent behavior independently | Next action: appliance-level troubleshooting with manufacturer guidance
When issues persist beyond accessory removal, the condition is no longer positional or correctable through adjustment. In such cases, further evaluation is required to separate accessory failure from potential appliance-level faults.